


Mold in paleontology can mean two things. The first (bad kind) happens when you get water trapped in your field jackets (plastered specimens), it sits for ages, and grows a nice layer of Becky-breathing-impairing mold. The second (good kind) is when we need to make a copy of a fossil. Not just any copy, but an exact copy. This could be because a fossil is one-of-a-kind, and we need to show it to other researchers without fear of damaging the original. Or maybe it’s a really neat specimen we want to give away as a souvenir or include as a hands-on demonstration, allowing people to touch the copy.
A mold could be a simple one-sided “dump” mold, where only half of a fossil is copied. This is good for a display mount, perhaps a nice shelf specimen, or giveaways to kids. If the whole fossil is needed, we could need a two-, three-, five-, or even ten-sided mold (depending on the complexity of the fossil). No matter what size mold is created, we make sure the fossil can take the stress. Generally a very thin sealer is put on the fossil to make sure the silicone (our mold material of choice) doesn’t sneak into cracks. Then, we figure out where the pour spout will be and any vents. Anything projecting to the side above the spout or vents can trap air bubbles – so we make sure everything leads up and out. In metal casting, this is called your “sprue” system.
Walls keep the silicone in a mold while it sets. Some people use wood or clay – We use LEGOs! They can make any shape, the clay doesn’t stick to them, the silicone doesn’t stick to them, plaster doesn’t stick to them – they’re perfect to use and reuse. If you notice an odd brick pattern on the sides of all my molds, that’s why.
Sometimes part of the fossil being molded will be embedded in clay (sulfur-free, or my silicone won’t set). As the clay is sculpted around the fossil, I have to imagine it as future silicone. No undercuts or thin spots, or else the silicone will be very difficult to remove and put back together again. The initial silicone is poured on top of the clay/fossil combo and left to cure. Once cured, a mother-mold may be added – this is a stiff backing, which could be plaster or fiberglass to add support later. The mold is flipped over, the clay removed, and a release agent placed on the now-visible silicone we just let cure. Silicone likes to stick to itself, so we need to put a thin barrier in place. Vaseline works great and is inexpensive. We repeat the silicone/mother mold process on the other side, or sides, depending on how many pieces a mold needs to be. Ta da! After everything is cured, the fossil is removed, and the mold is ready to go!
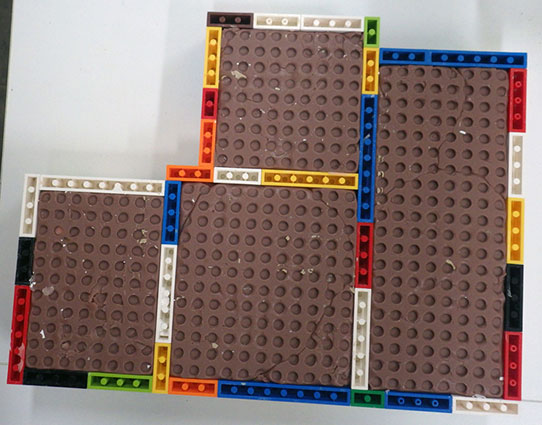
Multi-fossil mold, to reduce the amount of LEGOs used. Clay backing is visible.
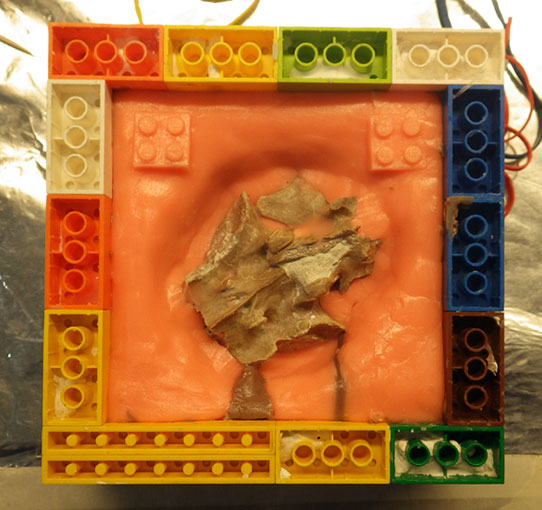
Clay backing has been removed, and the first pour (opposite side) of silicone can be seen surrounding the fossil. Clay pour-spout and vent (bottom) left in during the second silicone pour.
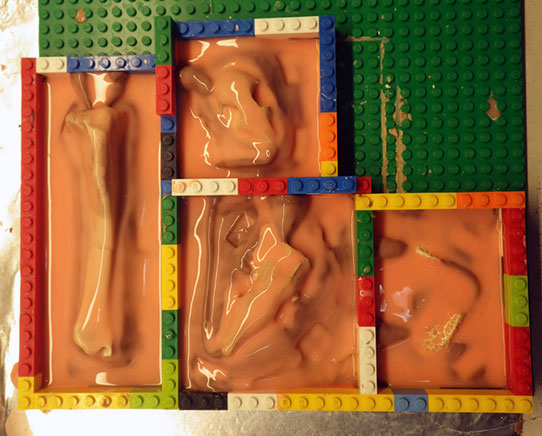
A thin coat of silicone poured over fossils, and then a thicker coat. This helps to reduce any bubbles our vacuum chamber misses.
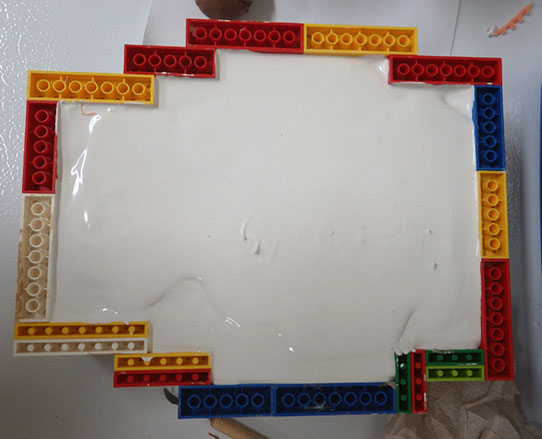
A small mother mold consisting of plaster and cheesecloth helps add rigidity to the end mold. The LEGOs and fossil will be removed next, when the mold is split apart.