


The education team at the North Dakota Heritage Center & State Museum is working to develop a fur trade program similar to the “Red River Rendezvous” interpretive program created at the Pembina State Museum. The Pembina program uses a pair of muskets that a former site supervisor at the Missouri-Yellowstone Confluence Interpretive Center manufactured. He hand-carved a model and formed several silicone molds, which he tested before pouring the resin to create the rifles for Pembina.
I paint tiny, nerdy things. One of the side effects of this hobby is that people often mistakenly think that because I paint little plastic figures I can paint larger things as well. During my 12 years of painting, I have learned a lot of tips and tricks, but these do not always translate to larger items. Nevertheless, I volunteered to take on the task of fixing up and painting a couple of miscast test models for the ND Heritage Center program, which was a worthy challenge.
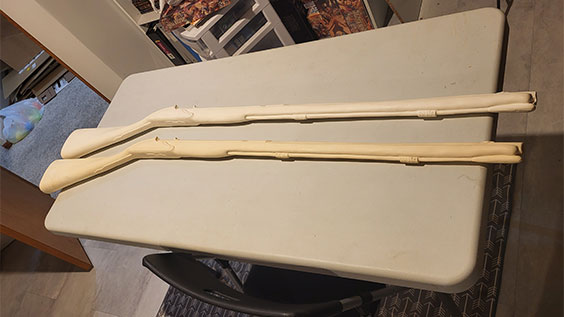
The rifles were so long I could not use my regular painting table and had to prepare a special workspace for this project.
The problems with these rifles arose from the molding process. Mold lines are a common feature of any molded item. These lines are a byproduct of the casting process. As the two halves of the mold come together, gaps or misalignments can cause lines to form at the halfway mark. Besides the mold lines, air bubbles in the resin had caused pockets and holes. I needed to trim the tip of the rifle barrel as one half-circle section was longer than the other. Oh, and one of the rifle’s sights was missing.
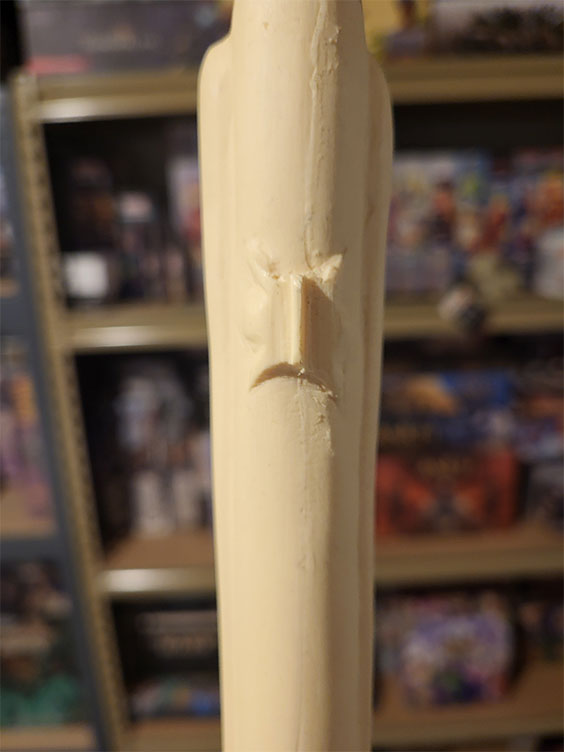
Mold lines running down the middle of the rifle’s barrel. The gun was also missing the sight and had many scuff marks.
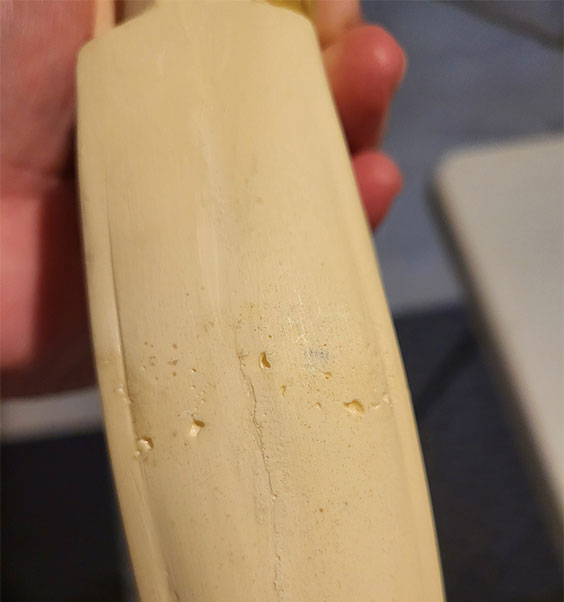
Here, air bubbles in the resin rose to the surface and left holes during the casting process.
To fix these issues, I started with an Exacto knife and trimmed the barrel to make it even. I also scraped away mold lines to make the join line as smooth as possible. Unfortunately, I could not completely eliminate the mold lines without potentially damaging the desired shape of the rifles. I would try fixing these in the painting process using an acrylic resin. I had to turn to a different tool and skill set to address the air bubbles and missing sight.
In the world of miniatures, there is a substance called “green stuff.” Its actual name is Kneadatite. Green stuff has two parts—a yellow filler and a blue hardener. Mixing the two parts produces a sticky green modeling putty with unique properties often used for filling gaps in miniatures. Before 3D sculpting with computer programs like Blender or ZBrush became common in manufacturing miniatures, green stuff was the medium of choice for skilled artisans to sculpt original miniatures. While most of my green stuff work was filling holes, several areas required a bit of sculpting, such as the missing sight. With most of the problem areas fixed, it was time to prime and paint. A quick spray of brown primer got these rifles ready for my brushes.

Kneadatite before being mixed.

A fresh batch of green stuff ready to fill air holes and fix other imperfections in the rifles.

Using a silicone sculpting tool, I smoothed the green stuff into place, so it looks like it always belonged.
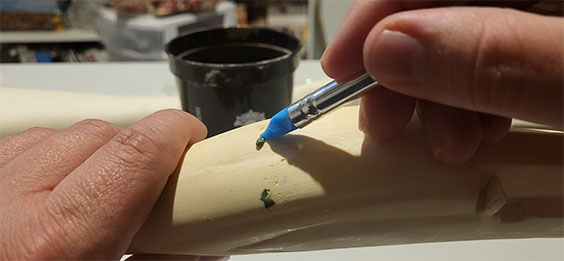
A close-up as I push green stuff into the same holes as above.
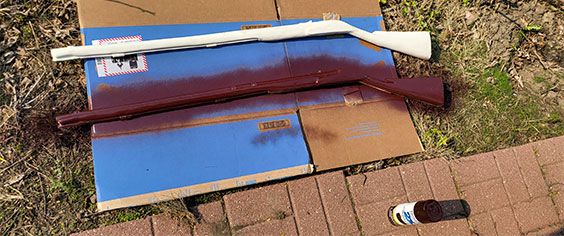
Lovely spring weather allowed for outdoor priming.
My biggest challenge when painting large items is making them look real when viewed up close. I have tricks for painting 28 mm scale wood grain, but those don’t work on life-size models. One of the education team’s first decisions was that we did not want to make the rifles look too real. This program might travel to schools, and we wouldn’t want to cause alarm. It is also one of the reasons we did not include the trigger and firing mechanism on the finished product. These were also the parts most likely to break, according to the staff at Pembina.
The paint process for the metal was pretty simple. I applied a base coat of silver followed by a technique called shaded metallics, which you can read all about in a past blog post about painting patina. This gave me a nice worn metal look. I followed a similar process for the brass. Trying to find the right color for the wood on the rifle took some thought and looking at lots of reference images. In the end I found a medium brown color from Vallejo Acrylic Paints that worked for a base coat on the main body of the rifle. I added a few other colors to create wood variations on other parts of the rifle. Then I ran into a problem. In my original plan, I wanted to use a brown ink to help shade in the wood’s nooks, crannies, and crevices. After completing one side, I could tell I had made a terrible mistake on the first gun.
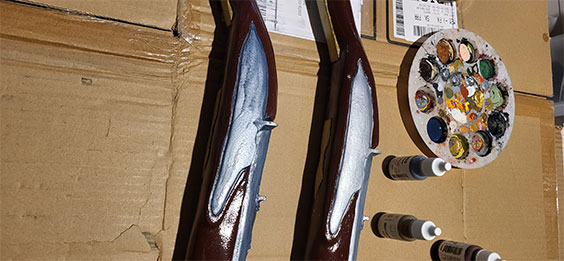
The rifle on the left has had the shaded metallics treatment applied; the one on the right shows what the metal looked like beforehand.

I used a thinner coat of brass on top of the darker metallic undercoat to make it look worn.
In my years of painting, I have taught several individuals how to paint miniatures. One of the first things I always tell them is that most painting involves fixing your mistakes. You will mess up at some point, but everything is fixable. For this project, all I had to do was repaint the wood color and fix where the ink had dripped down and across my completed gun barrel in a couple of spots. The only thing lost was the time spent redoing those sections.
The next problem I needed to overcome was the butts of the rifles. The rifles at Pembina State Museum either had another piece that we made to cover the gun butts or were finished to look that way. After pondering the issue for several weeks, I found examples of trade guns with the stock wrapped in leather. At first that seemed easy enough to pull off, and I even went out and bought supplies. But I soon realized that I was out of my depth. A quick phone call later, I recruited the best seamstress I knew to help me. And all it cost me was bringing one of the grandkids along.
This decision proved one of my best. With my mom’s help, we created a pattern and cover. She also had a much better selection of leather pieces than I could find at the store. So we were able to come up with something we both thought worked well.

With the help of reference photos and the sewing expertise of my mom, we were able to cover the gun butts with faux leather.

My son, Calvin, takes a break from playing with Teenage Mutant Ninja Turtles from my childhood to help me try some weathering on a spare piece of leather.
With the covers completed, I only had one step left. I needed to add the classic trade gun decoration of brass tacks. The tacks were cast separately for the original program rifles and later glued into place. I admit it was probably the fastest way to complete this task, but casting resin is not a skill I have learned—yet. I went with what I knew and used real tacks. With a pin vise tool, I drilled small holes into the rifle. I tried to match patterns I had seen in different reference photos. A small problem arose with my tacks being longer than I could drill into the rifle, so I snipped the ends. After a drop of glue to secure each tack, I could finally call this project done.

A pin vise is used to drill holes into the rifle.
Overall, this was a fun challenge. Plus, it is always great to help with any project that improves the offerings of the State Historical Society of North Dakota. I estimate I spent close to 20 hours on this project. All of it was worth it. These rifles will be used in Medora at the Chateau de Morès State Historic Site as part of an August teacher workshop that we are presenting on trade and transportation. Be sure to sign up if you are a teacher and want to see these rifles in person.
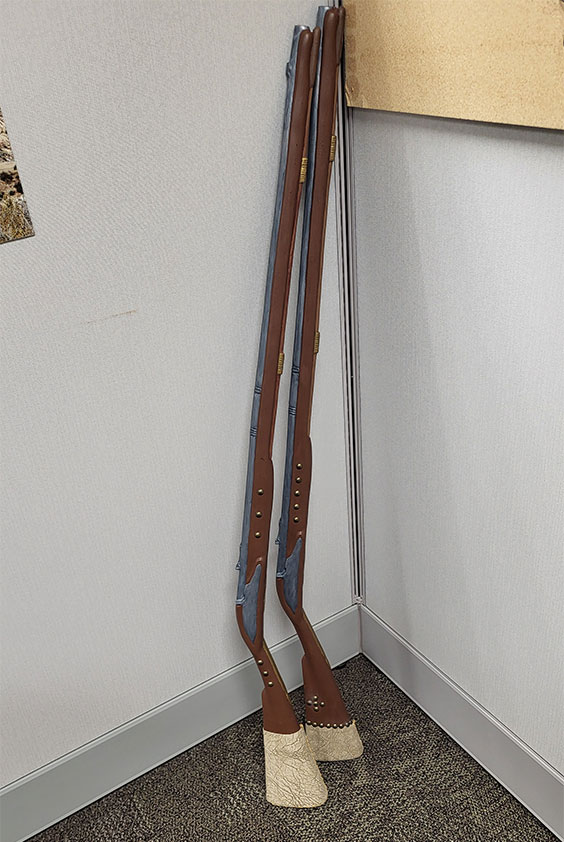
My completed masterpieces with brass tacks in place.