I awake in my canopied four-poster bed to a peal of thunder from beyond the lace-curtained windows feeling a bit like a character in a “Bridgerton” or “Downton Abbey” spinoff. Where am I? But more importantly what century am I in?
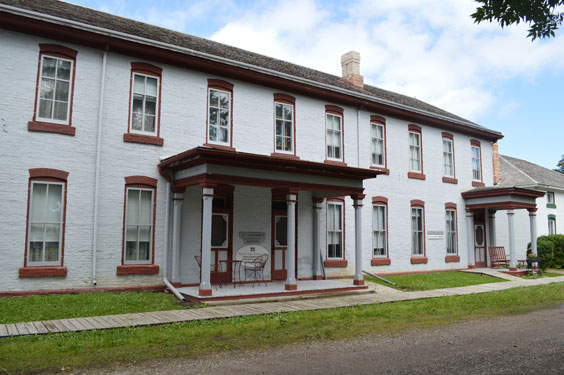
For guests, like myself, of the Totten Trail Inn at Fort Totten State Historic Site near the shores of Devils Lake, such questions are almost inescapable. Located in the former 1st lieutenants and captains’ quarters, the inn invites you to “send your imagination dancing to the tune of a different time and temper,” a time noted for its fainting couches and wreaths made of human hair. But I digress.
Now an Airbnb, the two-story inn, managed by the Fort Totten State Historic Site Foundation, has 10 rooms, each furnished with pieces representing the era from 1870 to 1910.

The grand oak staircase at the Totten Trail Inn.
“[Airbnb] has opened up our inn to people who have never heard of it,” says Gayle Gette, foundation treasurer. She adds that since becoming an Airbnb this year, by mid-July occupancy was already nearly double that of the entire 2021 season. Before fees, rooms run respectively $100 (with a shared bath) and $125 (with a private bath) per night.
Soon after my arrival, Jay Olson, a descendent of early Devils Lake settlers who along with his wife, Vangie, was serving as innkeeper during my stay, appears to lead me and others on a tour of the premises.
Built between 1867 and 1873 and situated within the present-day Spirit Lake Reservation, Fort Totten fulfilled multiple functions before becoming a state historic site in 1960. Initially constructed as a military outpost, by 1891 the fort had been decommissioned and converted into an Indian boarding school, teaching industrial and domestic skills alongside some basic academic education. After a brief interlude as a tuberculosis preventorium for high-risk Native children in the mid-to-late 1930s, the fort returned to an education focus, serving as a day and boarding school from 1940 to 1959.
The walls of the inn amplify the multiple narratives, which animate the surrounding fort’s 16 original buildings. Nearly every inch of surface space in this veritable living museum is covered with memorabilia, framed photographs, and historical tidbits. Corridors feature political, military, and Indian school artifacts, interpolated with gee whiz-style facts, such as: Two-thirds of the 7th Cavalry soldiers who died at the Battle of the Little Bighorn with Lt. Col. George Custer “were from companies stationed at Fort Totten,” and “by the turn of the 20th-century North Dakota had three times as many miles of railroad in proportion to its population as did the United States.”
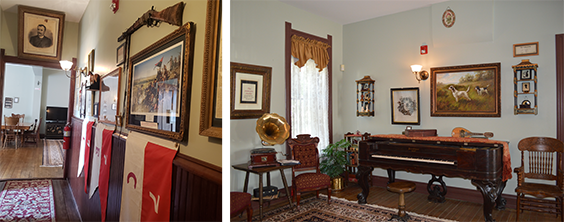
A hall featuring a replica of Crazy Horse’s rifle leads into the elegant parlor and dining area.
In the early 1900s, during the boarding school days, the building was renovated to better meet the needs of the employees who lived there. “What you see now is pretty much what you saw” then, Jay notes.
Rooms and hallways bear the family name of their sponsor. Mine for the night is the Horne Room. (Bev and Ray Horne were influential in the effort to transform the building into an inn, which opened in 2002.) Reflecting the family’s historical ties to flight and air racing, the room is decorated with such items as a vintage aviator cap and goggles, as well as a Charles Lindbergh biography, should insomnia threaten.
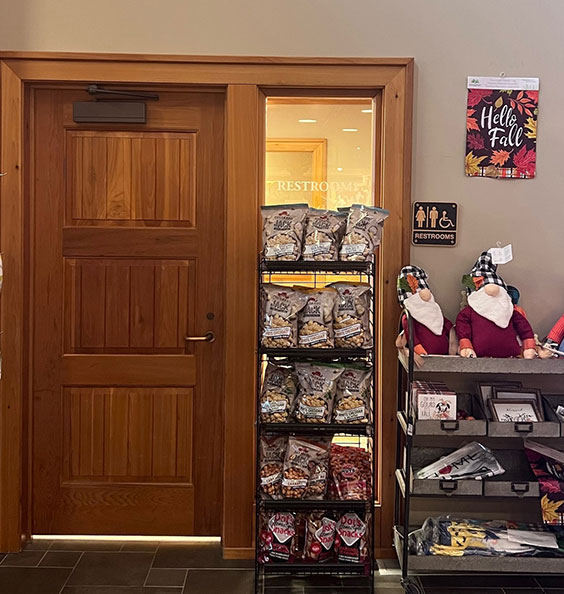
Just off the spacious dining room and parlor (outfitted with piano, gramophone, ornate fainting couch, George and Martha Washington portraits, and a circa 1875 hair wreath), there’s a full kitchen with pressed-tin ceilings and walls, where guests can store food or even cook. It’s best to come armed with supplies, as the inn no longer offers breakfast.
Upstairs guests can while away an afternoon over puzzles and poker in the game room (a TV is discreetly tucked away in a cabinet should you need a break from the past) or peruse binders of old photos and site-related articles in the cozy reading room adorned with stained glass, Toby mugs, and a towering globe. And if you are feeling lightheaded or winded after all those steps, a second fainting couch is strategically placed at the top of the staircase.
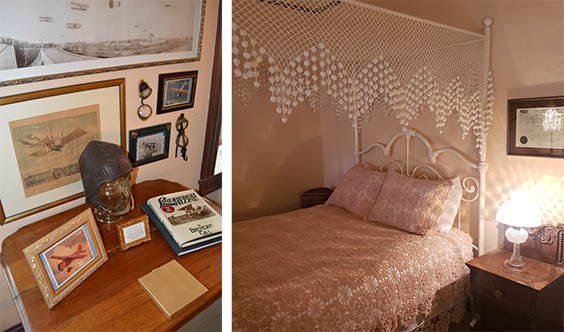
My digs for the night: the aviation-themed Horne Room.
Given its more than 150-year history, guests inevitably want to know if the inn has any resident ghosts—one popular travel blog dubbed it “notoriously haunted.” Jay is quick to downplay such suggestions, chalking up any alleged unusual occurrences to the “creaks and groans and shadows” that play tricks on your brain.
When my tour concludes, I head out for dinner and then, at Vangie’s suggestion, an evening at the White Horse Hill National Game Preserve, just a few miles from Fort Totten off Highway 57. You may not be able to “roller skate in a buffalo herd,” as the old Roger Miller ditty reminds us, but you can get close enough to see their nostrils (keep your car windows closed, folks). Farther up the hill, the prairie dog town viewing platform provides the ideal perch for taking in unique rodent renditions of barking ballads and synchronized head moves.
Back in my room night descends swiftly, the dim light and pompoms from the bed’s canopy casting eerie shadows up the walls. I slip under the pink crocheted bedspread, drifting off to the sounds of footsteps overhead as guests return for the evening.
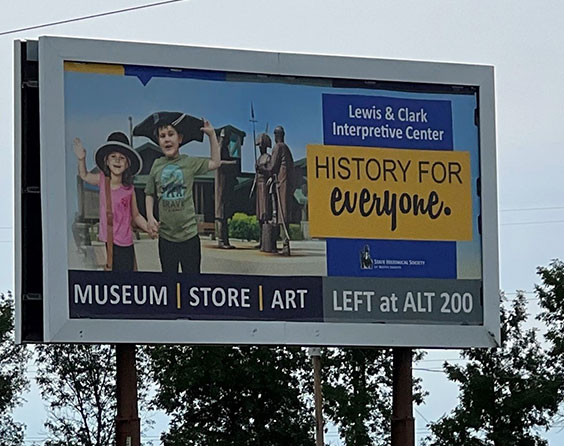
By the time I creep out to the dining room the following morning, the thunderstorm has passed, and the reassuring drip of a coffeemaker can be heard. It’s so pleasant in the light airy space I’m tempted to toss aside the day’s sightseeing agenda and assume a new persona as a lady of 19th-century leisure. But after a second cup of Jay’s suitably strong coffee and a chat with Vangie, I venture out to explore the Fort Totten State Historic Site, starting at the visitor center. There you’ll find an overview of the site’s evolution, along with brochures allowing you to experience the buildings through the eyes of a soldier, an industrial school student, and a Native American boy who played on the high school basketball team in the 1950s.
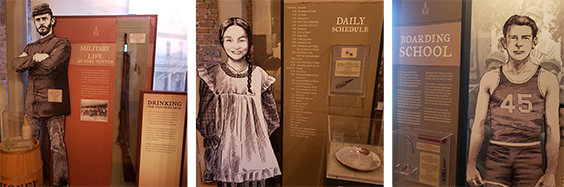
Fort Totten State Historic Site invites you to experience the space from multiple perspectives.
The interpretive content touches on the site’s darker chapters—the military fort’s role vis-à-vis surrounding tribes, the harsh conditions of the boarding school. But the site also details the ordinary life of its various inhabitants, from diets to daily chores to downtime, and even features associated curiosities such as the eccentric headgear of the Odd Fellows order established at the fort in 1879 for the care of military widows and orphans.
At the former military hospital/school cafeteria building, I duck into the Pioneer Daughters Museum. Exhibits highlight the organization’s sizeable collection of items donated by settlers and members of longtime Lake Region families, including the Bergstroms, whose name is on one of the rooms in the Totten Trail Inn. Among the items on display is an anchor from the famed Minnie H steamboat (which once plied the waters of Devils Lake), a 7th Cavalry helmet with horsehair plume (from notorious Devils Lake founder and one-time Fort Totten engineer officer Heber M. Creel), as well as an impressive array of glassware and children’s toys. Though the Pioneer Daughters turned the operation of the museum, on-site since the 1930s, over to the State Historical Society in 2016, they still help with Living History Field Day tours and reenactments.
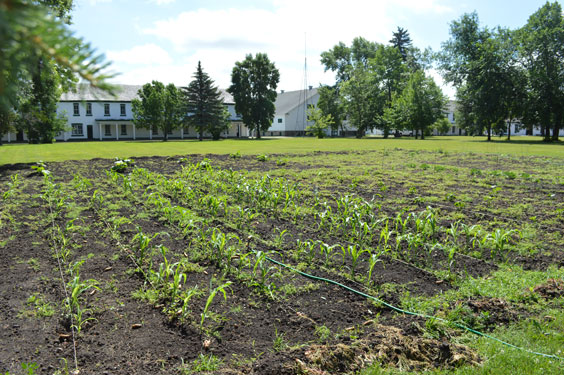
Produce grown in Fort Totten’s victory garden is donated to the Hope Center food pantry in Devils Lake.
Emerging from the museum, the late morning heat threatens, and I take refuge under some trees looking out on the fort’s victory garden. Bells from the mission across the street echo in the Sunday air. For a moment, the sun’s glare on the surrounding green of the parade ground sets my head spinning. Do I sense I dizzy spell coming on?
Good thing I know where to find a fainting couch.
Totten Trail Inn can be booked online via the Airbnb website from Memorial Day weekend through Labor Day weekend. For more information, visit tottentrailinn.com.