Backstage Pass to North Dakota History

This blog takes you behind the scenes of the State Historical Society of North Dakota. Get a glimpse at a day-in-the-life of the staff, volunteers, and partners who make it all possible. Discover what it takes to preserve North Dakota's natural and cultural history.

Five of My Favorite Things about the Collections Right Now

Since 2011, I have had the immense privilege of managing the State Historical Society of North Dakota’s archaeological collections, perhaps one of the most spectacular archaeological collections in the Plains. But as you are reading this, I am on the verge of a major cross-country move, and am suddenly cognizant of everything I will not have a chance to talk about in future blogs.  Here are five random and cool things I have been thinking about or working on recently!

1) My Favorite Squash Knife

Mandan, Hidatsa, and Arikara women were gardeners. But “gardeners” does not quite capture the scale of their agricultural achievements, the significance of their efforts to the economic success of their communities, or the physical and intellectual work that went into growing corn, beans, squash, and sunflowers this far north. Families would have plots ranging from 3-5 acres, so that for any village, the “gardens” might cover several hundred acres.

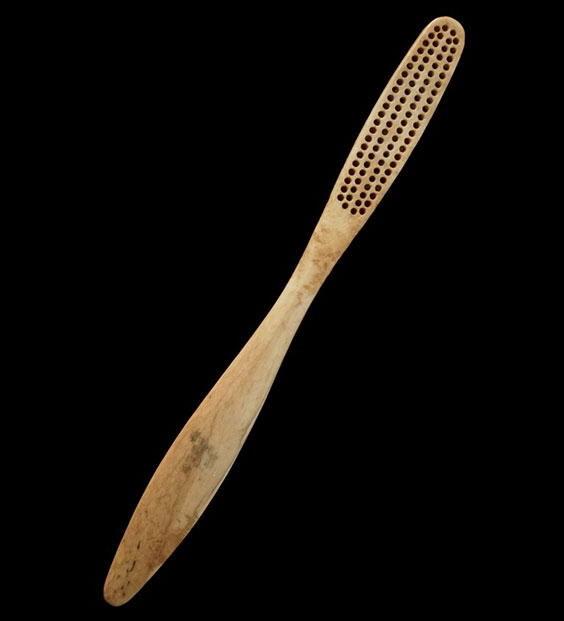
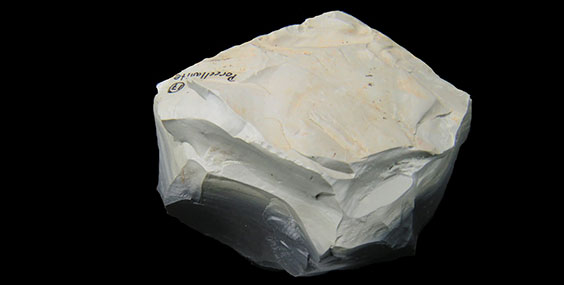
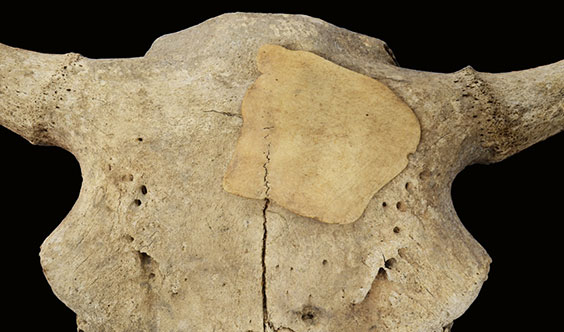
The squashes grown by the three tribes were typically harvested in the fall. They were sliced with squash knives into rings to be hung and dried for winter. Squash knives are flat, thin cutting tools made from animal bone. Typically, squash knives were made from bison scapulae (shoulder blades), because the scapula is one of the only bones in a bison’s skeleton large and flat enough for the job. The edge would have been ground to a sharp edge to cut through all those squashes after the harvest.

Last year, one of our volunteers was rehousing an older collection into archival materials, and she came across a squash knife. It was cool, but not uncommon. But then someone noticed that the knife had a cranial suture going down one side! That is because the scapula is not the only flat section of a bison’s skeleton. The top of the cranium (skull) is also flat, and was occasionally used to make squash knives as well. This was by far my favorite find of the last year.

squash knife

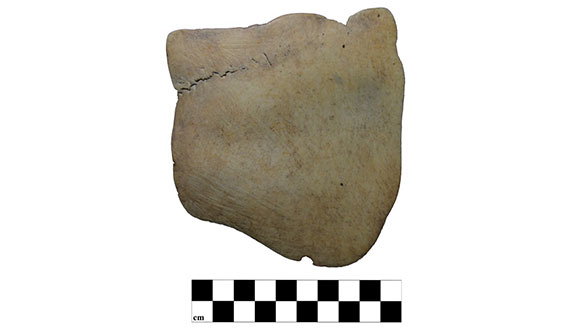
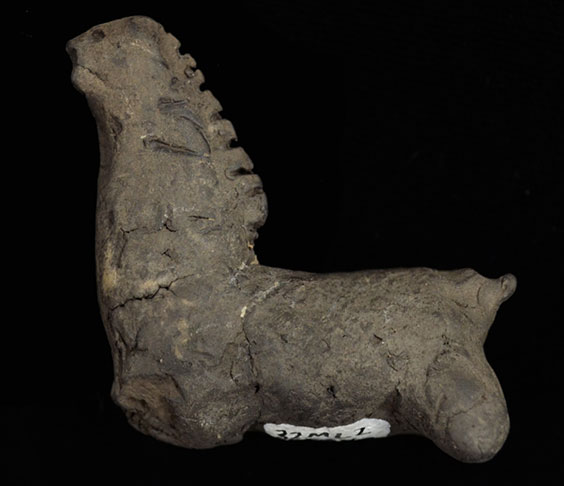
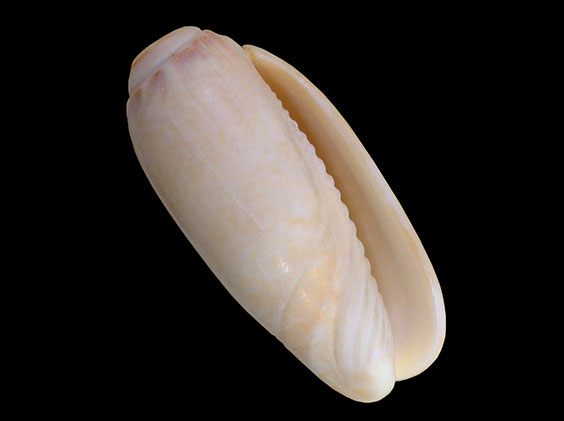
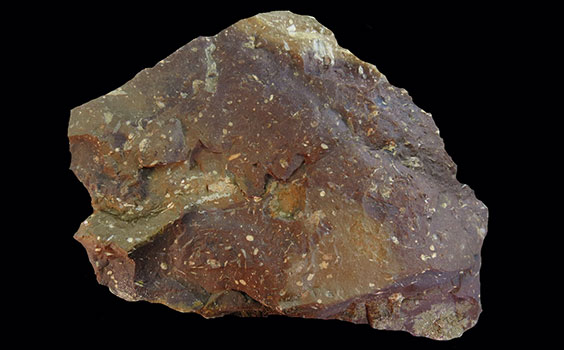
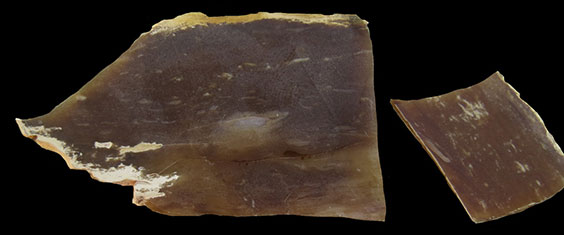
This is a squash knife made from a bison cranium. Notice the cranial suture (here it looks like a black wavy line) extending from the left margin toward the upper right.

squash knife on bison skull

Here is a picture of the squash knife superimposed on a bison cranium, so you can see what part of the bison was used to make it. (Image courtesy Meagan Schoenfelder).

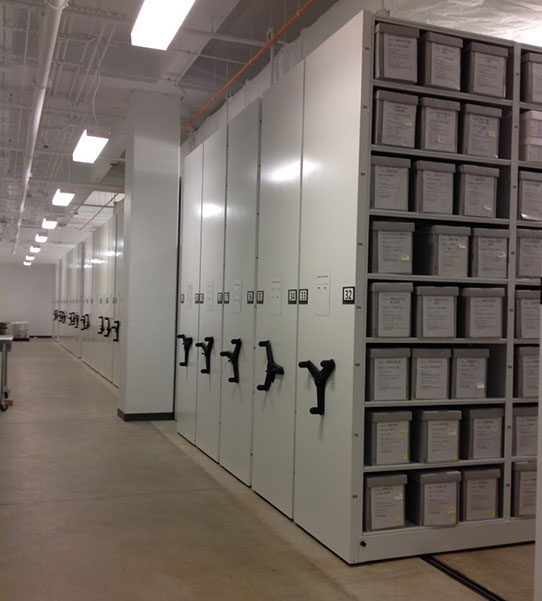
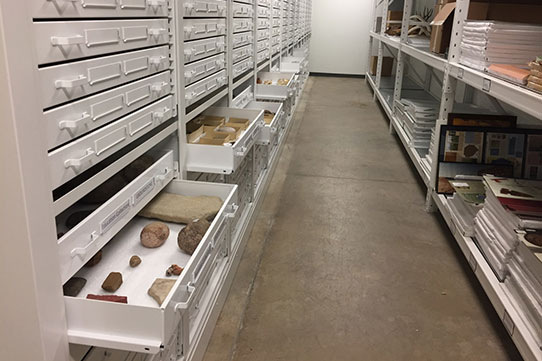
2.  My Favorite Solutions for Artifact Storage

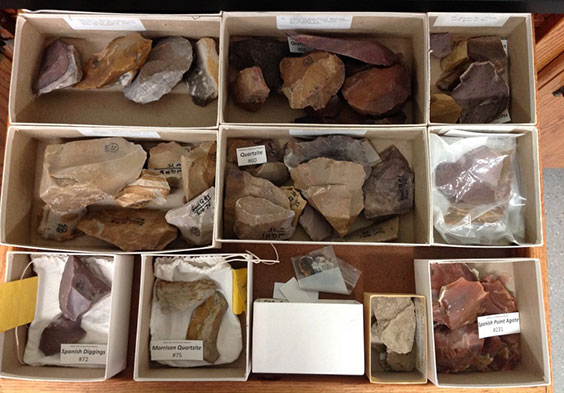
Decades ago, State Historical Society archaeologists and curators had to work with whatever resources they had, and sometimes their solutions for artifact storage and labeling are pretty creative. These are some recent examples of artifact storage that we have come across as we have been rehousing older collections. Meagan and I often wonder what we do today that will confuse, amuse (or enrage?) future curators.

Curtiss chocolate box

Secretarial Typewriter Ribbon container

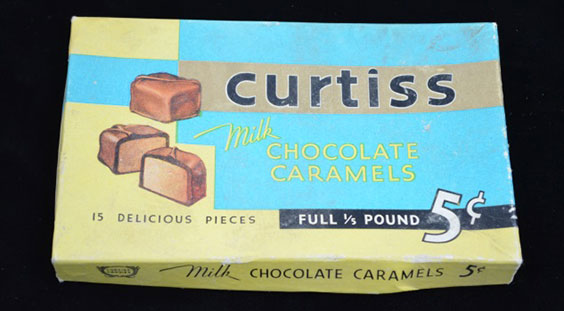
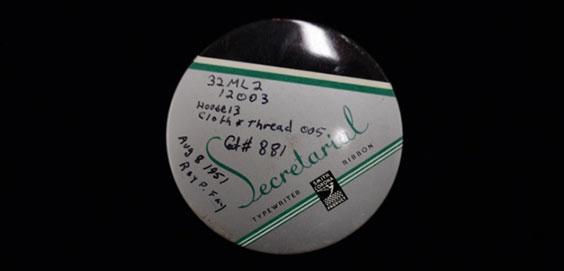
Artifacts were donated to us in every kind of packaging you can imagine: cigar boxes, chocolate boxes, medication bottles, chewing tobacco tins, and typewriter ribbon containers .

Calcium bottles filled with shells and shell beads

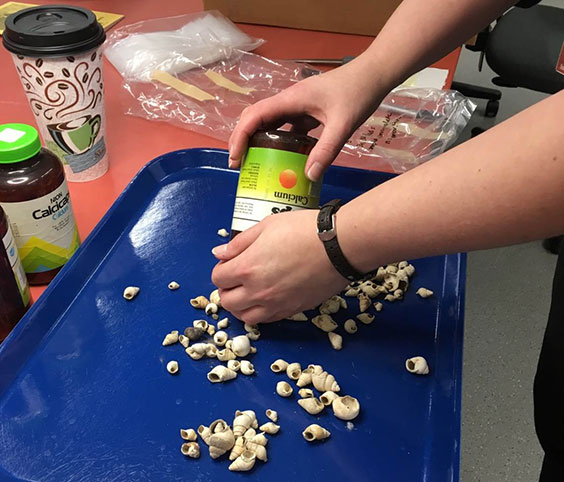
Hundreds of gastropod shells and shell beads were found inside these calcium supplement bottles.

pill vials filled with beads

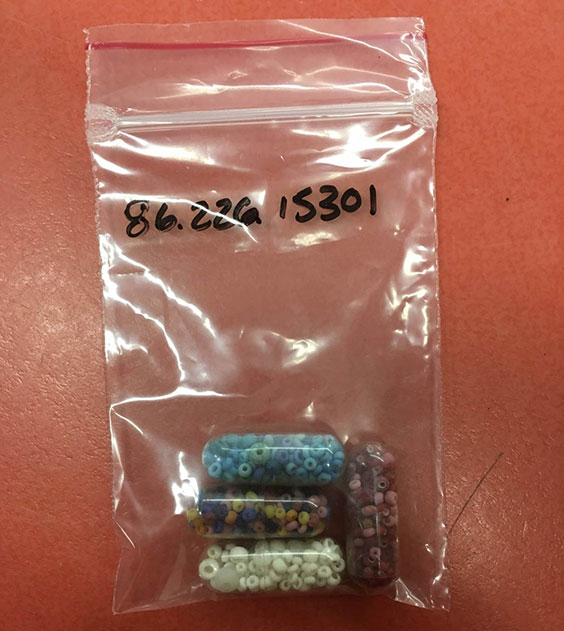
These are not actual pills! They are tiny plastic pill vials someone used to store historic glass seed beads.

Bagnell site collection box

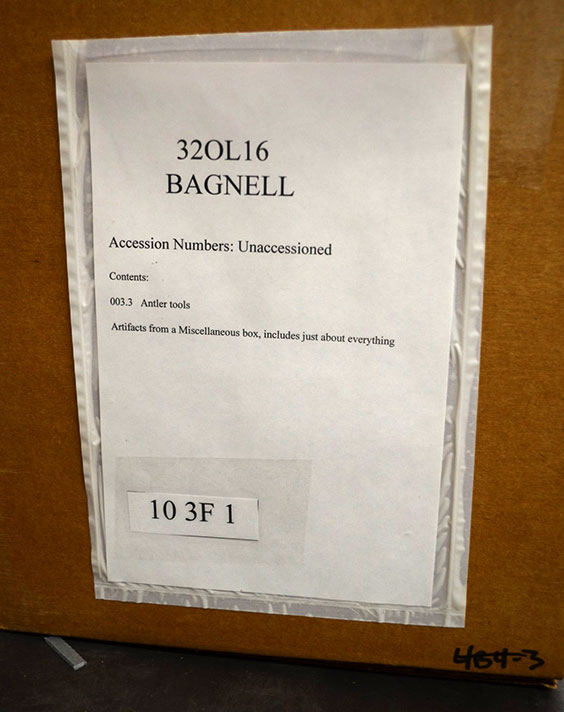
This box from the Bagnell site collection (very unhelpfully) tells us what is inside: “Artifacts from a Miscellaneous box, includes just about everything.”

Small artifact with very large tag on it

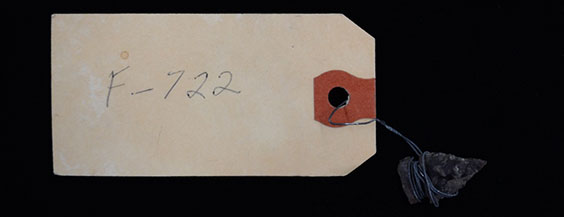
We are not sure if this artifact has a history of running away, but someone thought it necessary to wrap it in about a mile of wire and attach it to this enormous tag.

3. Volunteers as Pioneers

Mary Seidel, a local volunteer who started processing artifacts and archives in our lab last year, is a pioneer of long-distance volunteer work. She got so excited about lab work in 2018 that she asked for something she could do from her desert home in Nevada, so she could continue to support the State Historical Society mission during the winter. So we introduced her to Ernst R. Steinbrueck, first field officer of the State Historical Society. During the early 1900s he documented and excavated many village sites along the Missouri River. He wrote long (and sometimes ornery) letters back to Society administrators in a beautiful script that we needed transcribed, as many of them contain information about artifact collections and site locations. In less than a year, Mary transcribed scans of more than 100 letters from Steinbrueck’s papers (some of them 11 pages long!) Many thanks to Mary for not letting 1,300 miles get in the way of her passion for preserving North Dakota’s history.

Man's portrait and a letter

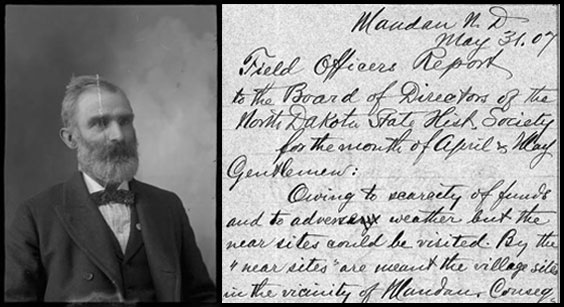
A portrait of E.R. Steinbrueck, and one of his many letters curated in the State Archives.

4. Creepy Doll Parts

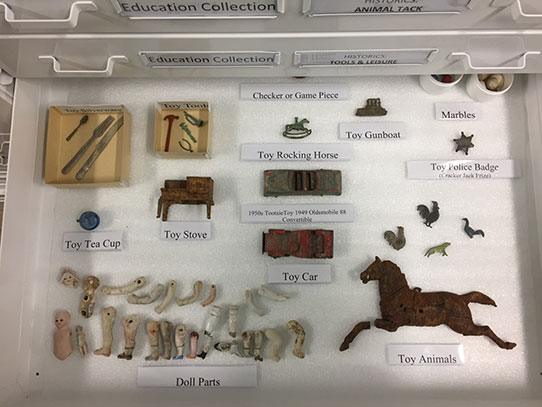
Historic dolls provide valuable information about everything from consumerism to gender norms to the socialization of children. But as someone who has both excavated and curated artifacts, I can tell you that finding doll parts — eyeballs, legs, or heads, for instance — is also downright creepy. A few of us have bonded about this, and visitors on our tours feel the same when we open the historic toy drawer and disembodied heads are staring back at them. I don’t have much more to say about this — it is just something I think you should know.

Doll arms, legs, and heads

Doll head with torso and a doll arm

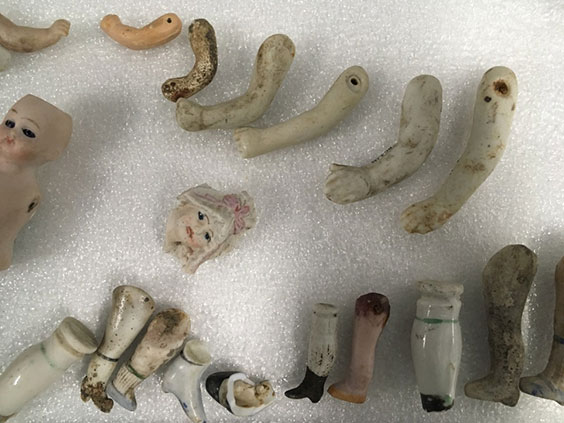
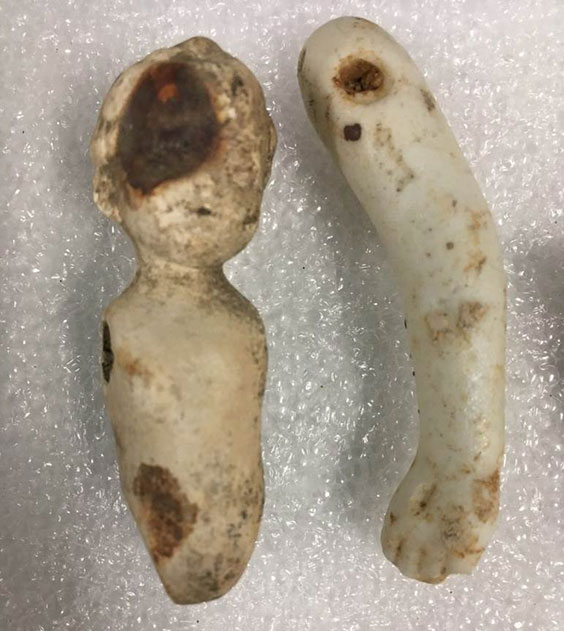
Doll parts from various historic sites in North Dakota.

5. Thank You Notes from Schoolkids

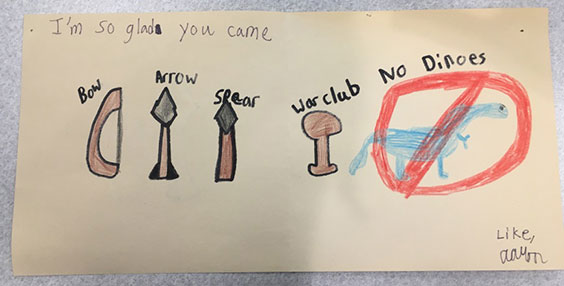
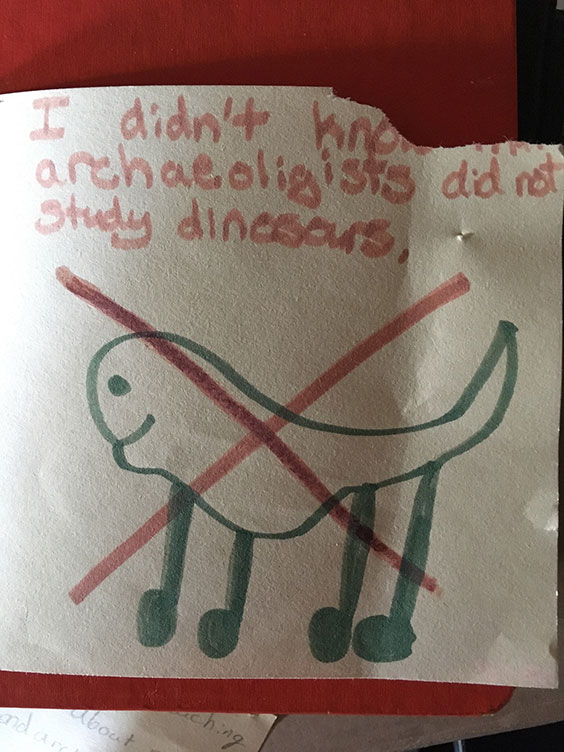
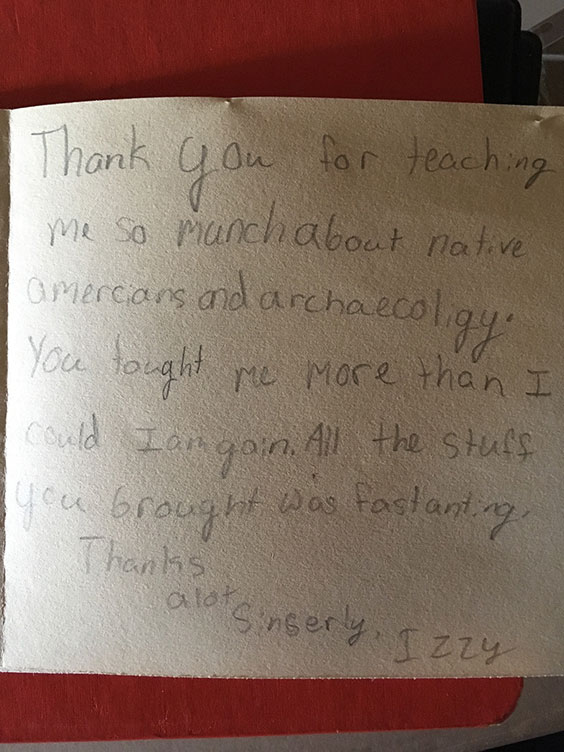
I love doing programs for school groups because kids often make excellent observations (important in archaeology!) and ask some pretty insightful questions. But my favorite part of working with school groups is getting the thank you notes a few days later. Here are some of my favorites from the last few years:

Card with drawn weapons and a dinosaur crossed out

Card with drawing of dinosaur crossed out that reads: I didn't know that archaeologists did not study dinosaurs.

Thank you for teaching me so munch about native americans and archaecoligy. You tought me more than I could I am goin. All the stuff you brought was fastanting. Thanks a lot. Sincerely, Izzy

It’s the Little Things: Exhibiting Small Collections with Artifact Photography

As someone who is tasked with increasing public access to our archaeological collections, here is one of the biggest challenges: some artifacts are very small, while exhibit cases can be very big. In fact, archaeological artifacts that tell some of the biggest stories about North Dakota’s past can be measured in mere centimeters. When our average visitor might spend less than 20 minutes in an entire gallery, chances are high that the smallest artifacts could be overlooked.1 In a museum that comprises five galleries, thousands of displayed artifacts, dozens of tech and media installations, and tens of thousands of words of interpretive text — how do you help visitors appreciate some of the smallest representations of our state’s history?

Photo exhibit showcasing 8 small artifacts

The first installation of the Small Things Considered artifact photo exhibit, 2016.

When confronting this challenge in 2016 while planning for the 50th anniversary of the National Historic Preservation Act, we opted to display these collections in the form of a photo exhibit. Titled Small Things Considered, the exhibit featured 12 large (11”x17”) color photos of archaeological objects. The exhibit was a hit, and ended up being an effective way to give some of our smaller collections the spotlight. So we decided to plan another one for 2019!

Putting together this exhibit is a team effort. First we need the go-ahead from the Audience Engagement & Museum Division, which schedules exhibit spaces. Once the space is secured, our division director and collections staff brainstorm about what unique or interesting artifacts we have come across lately. Then we either find photos we already have of that object, or we take new photos. Sometimes we find an artifact that is amazing to look at, but we can’t include it — because we don’t know enough about it to write an informative caption, or we feel that it needs more context than this type of exhibit allows. Other times we might find an artifact we know a lot about, but we don’t include it because it doesn’t photograph well, is too big, or we have a similar example on display elsewhere in the galleries. This time around we started out with more than 20 photo possibilities, narrowed it down to 14, but couldn’t get to 12. They were all too good, so we just bought two more frames!

Bone toothbrush

Bone toothbrush recovered from Lt. Col. George Armstrong Custer’s home at Fort Abraham Lincoln, ca. 1872–1876. The holes in the head of the toothbrush would have been filled with tufts of animal hair, usually boar bristles.

While our collections assistant Meagan processes the photos, I start researching each object so that I can write the captions. This is the best part.

I have mentioned before that we manage millions of artifacts, so we always have a lot to do. There are a lot of emails, digital records, databases, paperwork, and phone calls involved in managing a collection this size, which means that there are many days that I do not handle a single artifact. But this exhibit project affords me the luxury of focusing on one artifact at a time. I have always considered it a privilege to take care of these objects, and I take any opportunity I can to get to know each one of them better.

There are objects that I initially think I am not interested in (e.g., coins come to mind), but after a few hours of research, I find myself talking to anyone who will listen about the history of the nickel or the miracle that is a fish scale. And if I am being honest, not all of this is rosy — I also spent an afternoon tearing my hair out trying to identify the Tiffany & Co. design on a silver spoon (extra challenging when the handle — the most identifiable feature of an historic spoon — is completely missing).

My typical approach is to write captions that are too long, because I can’t bear to leave out any of the interesting information I found. Then our curator of exhibits and our editing team rein me back in, and we miraculously condense this research to about 50 words per artifact. Our division director gives final approval on photos and captions, and the rest is up to the exhibit installation team. Here are a few highlights:

1. 1866 Shield Nickel
I’d like to introduce you to my new favorite nickel, which dates to 1866 and was found near Fort Rice. The rays around the “5” were believed to have complicated the striking process when these were minted. The coin’s design broke the dies or resulted in a coin whose features were not as sharp in relief as they should have been. For these reasons, the rays were removed from the design in 1867. This object represents a shift in minting practices after the Civil War.

1866 nickle reading United States Of America 5 Cent

An 1866 Shield Nickel, the first 5-cent piece to be made from a nickel-copper alloy.

2. Clay Horse Figurine
While researching the clay horse figurine from the 19th-century site of Fort Berthold pictured below, I came across a historic photo that explains who likely made it. It closely resembles the clay figurines made by students at the Fort Berthold Indian Mission School during the 1870s. Note the detail in the horse’s mane, and the eye on the side of the (broken) face. Another less complete example in the same collection has holes in the bottom, which appear from the historic photo to have been used to insert small twigs for legs. The founder of the mission (1876), Charles Lemon Hall, learned all three languages (Mandan, Hidatsa, and Arikara) spoken by the students who attended the mission school.

Clay horse figurine

Clay horse figurine from Fort Berthold, ca. 1870s.

Multiple mud animals, including a horse, bison, elk, and more

Stereoscopic image of clay or mud animals made by Native American boys at the Fort Berthold Indian Mission School, ca. 1870s. Photo by O.S. Goff. (State Archives 00088.0031)

3. Olivella shell bead
The shell bead pictured below is about ¾” long. In a typical exhibit case (which is about the size of a small closet), its details might easily be overlooked when surrounded by larger or more colorful objects. But in this picture, you can see that the pointed spire at the top has been lopped off, which creates a hole through its body. You can also see the variegated color near the top, and the texture of the whorl. These Olivella shells (Olivella dama) are from the Gulf of California and made their way along trade routes to North Dakota. The presence of Olivella shells in this region demonstrates the extent of trade networks between Native groups long before Europeans arrived.

Olivella shell bead

Olivella shell bead (Olivella dama) from McLean County

It is important to display artifacts in the context of where, when, and with what other objects they were found, and our exhibit cases achieve that. The context of an artifact tells the story. This photo exhibit does not diminish the importance of context, but rather brings the beauty and details of individual objects into focus. Stop by the Merlan E. Paaverud Jr. Gallery outside the auditorium the next time you find yourself at the North Dakota Heritage Center & State Museum, and see for yourself!


1Average visitor time tracking statistics can be found in Exhibit Labels: An Interpretive Approach by Beverly Serrell, 1996, AltaMira Press.

Investigating and Assessing Damage to Cultural Resources

At the beginning of May, the U.S. Army Corps of Engineers (Omaha office) hosted a three-day training at the North Dakota Heritage Center & State Museum on investigating and assessing damage to archaeology sites and other cultural resources. I was excited to receive this training, but expected it to be a bit of a slog, as many trainings tend to be—stuffy room, uncomfortable chairs, and text-heavy Powerpoint presentations. I could not have been more wrong.

So why did we attend this training? The primary objective underlining the Archaeology & Historic Preservation Division’s many responsibilities is to preserve North Dakota’s cultural resources. “Cultural resources” is an umbrella term for all types of sites that have historical or cultural significance. This includes (but is not limited to) archaeological sites, historical sites, architectural sites, and cultural heritage sites. There are various federal and state laws that were written to protect these resources. For example, the Archaeological Resources Protection Act (ARPA), passed in 1979, states:

No person may excavate, remove, damage, or otherwise alter or deface or attempt to excavate, remove, damage, or otherwise alter or deface any archaeological resource located on public lands or Indian lands unless such activity is pursuant to a permit issued under section 4 of this Act…” [Sec. 6(a)]

It also prohibits the sale, exchange, transport, or receipt of (or offer to sell, purchase, or exchange) cultural resources if the resource was excavated or removed from public lands or Indian lands in violation of federal law.

ARPA applies to federal and Indian lands, but you may not know that North Dakota’s state laws protecting cultural resources are quite robust compared to those of other U.S. states. (I was well aware of the state laws that protect cultural resources on state lands, but I had no idea how far ahead of other states we are in this regard.) The North Dakota Century Code (55-03 Protection of Prehistoric Sites and Deposits) requires individuals to have a state-issued permit to investigate or evaluate cultural resources on state land. In this context, “cultural resources” include prehistoric or historic archaeological sites, burial mounds, and unregistered graves. Violations of this law are punishable by fine, imprisonment, or both.

Sign that reads the following: Preservation of this site depends on you. Digging and collecting artifacts and fossils on state land without permit is illegal. North Dakota Century Code Sections 55-03 and 54-17.3

This sign reminds site visitors of the state laws protecting cultural resources in North Dakota.

I don’t have the space to go into great detail about the training, but here are a few highlights:

1) I can’t say enough good things about the instructors. They were from Northland Research, Inc., a contract firm in Arizona. The instructors are trained archaeologists and investigators who work in Northland’s Heritage Protection and Emergency Management division. Specializing in cultural resource protection, these are the folks who travel all over the country to investigate crimes relating to archaeological and other cultural resource sites. They record sites, work closely with law enforcement (since a damaged site is also a crime scene), write archaeological damage assessment reports, and act as expert witnesses in courtroom trials. Their slides were of actual work they have done—hardly the mind-numbing Powerpoints I expected!

2) The class was huge (45 people!) and represented nine U.S. states. And it wasn’t just archaeologists. Other students included natural resource specialists, representatives from tribal historic preservation offices, police officers, assistant U.S. attorneys, historic site managers, and park rangers. One of my favorite aspects of the class was hearing other students’ questions; each one spoke to that person’s expertise  and the unique role he or she plays in the investigation of a cultural resource violation.

3) There was a field component (a sure way to make any archaeologist happy!). For one afternoon, the instructors created ten “mock” crime scenes at fabricated archaeological sites near one of our off-site storage facilities. They divided us into teams, each of which had a law enforcement officer as the head investigator. The “site” had holes dug into it and artifacts scattered across it (the artifacts were borrowed from the Archaeology & Historic Preservation Division’s educational collections). We had to use what we had learned in the class to document the damage and collect evidence. I really appreciated the fact that all of the documents we had to create (site map, evidence log, photo log, field notes, etc.) were critiqued after—it helped us to take the exercise seriously and ask a lot of questions about proper protocols.

Staged crime scene

The “staged” crime scene, which included disturbed areas, scattered artifacts, footprints, and modern trash. The yellow flags were placed by our team to mark different pieces of evidence.

4) Forensic sedimentology! Forensic sedimentology is based on the fact that soils in different areas (even very limited areas) are mineralogically and chemically unique. By using X-ray fluorescence and other analysis methods, the mineral and chemical composition of soils from a looted site can be quantified and compared with the particles of soil on the shoes, equipment, and artifacts confiscated from the accused. Scientists can use this evidence to determine with astounding accuracy whether the suspect was actually at the site, or whether the object in question came from that site. The “where” of these cases is important, because different cultural resource protection laws regulate different jurisdictions (i.e., federal land, state land, etc.).

5) We learned how to create a plaster cast of a footprint! The instructors were kind enough to leave multiple bootprints in the soil of each of our test sites so that we could practice. Another important piece of evidence for the prosecution.

Plaster poured into footprint

Plaster was poured into footprints in the dirt. After left to dry for about 30 minutes, they could be removed and brought back to the lab for analysis.

Plaster cast of footprint

A completed plaster cast of footprints left at the mock crime scene.

6) The participation of the assistant U.S. attorneys was unexpected and really beneficial for the rest of us in the class. They value cultural resources enough to spend three days in this training, and it was important to understand the kind of evidence they need to build a case against potential looters and vandals.

As a collections manager who does most of her archaeological work indoors, it was also important for collections staff to be reminded of their role in these contexts. For example, if confiscated artifacts were ever stored here while a case was pending, we would need to be careful about meticulously documenting chain of custody and restricting access to the artifacts. When people come in with artifacts to donate, it is important for us to know whether they were legally obtained. When someone is assessing the cost of the resource damage, we can provide information on curation requirements and costs. We all have a role to play in protecting these resources, and I welcome any training that helps me do that better.

Many thanks to the U.S. Army Corps-Omaha for hosting the training, and to Martin McAllister, Brent Krober, and David Griffel of Northland Research, Inc., and to all participants for a productive and enlightening three days!

Where Did You Find That?: The Importance of Archaeological Context

“Where did you find it?” This is, without question, the first thing you will hear any of our archaeologists ask when someone shows us an artifact. We are kind of obsessed with the “where” questions – where did you find it? Where did it come from? Where in the excavation unit was it found? What vertical level did it come from? Where was it in relation to (fill in the blank)? Where in the world did I put my trowel? (You wouldn’t believe how often I’ve asked the last one.) The “where” – technically known as provenience or context – is crucial to the artifact’s ability to tell a story. If you are a regular reader, then you already know that the object itself can provide some information about the human past. But if we don’t know its context, then it is pretty limited in terms of scientific value.

Field catalog

A field catalog for artifacts recovered during the 1951 excavation of Like-A-Fishhook Village in 1951 (AHP Archaeology files). Because we know which houses were occupied by Mandan and/or Hidatsa and which houses were occupied by Arikara families, knowing from which houses these objects originated is very important (House 4 was located in the Mandan-Hidatsa section of the village).

Imagine a projectile point that someone found in North Dakota. Perhaps they have mounted it in a frame in their home. From its shape and the technological style, I may be able to tell you that it is from the Archaic period. But that is about it. If it is an Oxbow point (for example), then it merely provides evidence that Oxbow technology is represented in North Dakota. It might be aesthetically beautiful, even ideal for exhibit. But it cannot tell us any more about human behavior and innovation in the past, which is actually what archaeologists are all trying to understand. Because at the end of the day, archaeologists are interested in understanding people, not things.

Now let’s imagine that the same point was scientifically excavated. We know from the additional excavation units around it that the point was found at a large camp site in Bismarck. Its vertical location (where it falls in soil stratigraphy) may tell us how old it is, or where it falls in time relative to other artifacts at the site. The artifacts found around it may help us understand what was going on in that spot. For example, if it was found in a pile of animal bone and cutting tools, we could infer that someone was likely butchering animals for food. If it was found in a pile of stone chipping debris and next to an antler pressure flaker, a different story emerges – perhaps this was a lithic workshop where stone tools were being manufactured. If a piece of charcoal found in its vicinity can be dated, then we can come up with a more exact age for the artifact. All of this information is documented during an excavation through extensive note-taking, sketching, photography, and mapping. And those records eventually make their way to the North Dakota Heritage Center & State Museum.

Field catalog cover

A field catalog from the excavation of the Flaming Arrow Village site (32ML4) in the early 1980s.

Field catalog entry

Entry made by crew member on July 20, 1971, while excavating the Hidatsa village of Amahami in Stanton, ND.

When I tell people that I am an archaeology collections manager, they typically assume that I only take care of artifacts. They are often surprised to learn that a huge and incredibly important part of doing archaeology includes creating, archiving, and referencing these paper records and photos. This also surprises archaeology students, who find themselves spending an inordinate amount of time sweating over notebooks or trying to draw wall profiles while wrestling graph paper in gusty winds during field school. This is actually a big responsibility from a preservation standpoint-- once the excavation is over, these paper records will comprise the most complete existing record of the site (or that portion of the site). In fact, when any archaeology contractor or state or federal agency submits collections for long-term curation, we require all the paperwork associated with their recovery from the field to be included.

General level/feature level excavation form

Plan map to go with general level/feature level excavation form

A general level/feature level excavation form, which is filled out for every excavated level (this one was filled out for the level that was at a depth of 95-110 cm). The associated sketch is the plan map drawn to illustrate what the bottom of this particular level looks like. It documents important observations like soil color and texture, artifact content and density, etc. This feature form is from an excavation at Double Ditch Indian Village Historic Site (32BL8), Feature 709, Ditch 4.

We curate these in acid-free, archival folders and boxes and index them now so they are easier for scholars to query when researching our collections. I have never had a researcher request access to collections without also requesting access to the associated paperwork. When we do not have the paperwork providing context for a given collection, the researcher often has to exclude those objects from his/her study. That should give you a sense of their importance!

Detail of House 3 entrance, firescreen (?) and primary fireplace

Cross-section of F28, House 3, firescreen (?) trench.

Photos of features in House 3 at Huff Village (32MO11), 1960.

So the next time you visit our State Museum or state historical site interpretive centers, remember that behind every artifact we are able to say anything about, there is likely a box of associated notes and photos that helped us tell that story.

Like a Rock: Lithic Comparative Collection of the State Historical Society of North Dakota

Artifact identification and analysis is central to what we do in the archaeology lab. But most of us do not always know exactly what we are looking at – and we would not be very good scientists if we pretended we did! So how do we figure it out? What do we do when we do not know, for instance, what kind of lithic (stone) material was used to make a projectile point, or what kind of shell was used to make a bead? That is where our reference collections come in.

Lithic comparative collection

One drawer of many in our lithic comparative collection. The loose tags inside are for use in photography.

A reference collection is a grouping of specimens that have been thoroughly researched and identified by an expert in that field and labeled accordingly. Think of it as a 3D encyclopedia. With anything I can’t identify on my own (or maybe I just want to be more confident about my identification), I could compare to examples in the reference collection until I find the match Okay, it doesn’t always work that tidily, but you get the idea. Over the past few months, I have been working with my co-worker, Amy Bleier, and some of our volunteers to get the lithic comparative collection organized and ready for use by researchers and contractors. But you may be wondering… why would archaeologists find a collection of different types of stone useful?

Lithic raw materials have unique mineralogical signatures that allow you to trace them back to their source (e.g., an outcrop of rock in eastern Montana). So if you know that someone at a hunting camp in eastern North Dakota was making tools from a stone that originates in Colorado, then it tells us something about human mobility during that time, and/or trade relationships between those hunters and groups in distant areas. We can also find patterns – for instance, the raw material that people use may change over time (directing us to look for changes in other behaviors, such as subsistence or settlement). Or people may only use a certain material for particular classes of tools – this helps better understand tool technology and specialized knowledge relating to flintknapping.

Lithic raw material sources map

A map of lithic raw material sources in the North Dakota region. Note the concentration of sources west of the Missouri River.

Physically assembling a collection likes this is the most difficult and time-consuming part. We were fortunate to receive a donation of a completely assembled lithic comparative collection from the late Stanley A. Ahler, Ph.D., whose work in the region laid the foundations for the last thirty or so years of archaeology in North Dakota. Over many years, Ahler, with help from his colleagues and acquaintances, collected more than 280 lithic samples from across the United States. We regularly rely on this collection for lithic analysis. But now we want it to be useful to people who can’t come to our office when they need to compare different types of raw materials.

With the help of SHSND volunteers Doug Wurtz and David Nix, we have taken high-resolution photos of all specimens, written narratives on their origins and characteristics, created finding aids, and compiled a bibliography for the 16 most commonly found materials in North Dakota. The next step will be to create an app for mobile devices so archaeologists and other researchers can take advantage of the collection while they are in the field or doing analysis in their own labs.

Antelope chert

Antelope chert is silicified peat that occurs primarily in non-glaciated areas southwest of the Missouri River. It comprises woody plant materials and can contain whole or fragmented gastropod shells. The type site (and quarry) is in McKenzie County, North Dakota.

Porcellanite

Porcellanite is vitrified claystone and shale that forms around burned lignite seams. The source area is concentrated in southeastern Montana, northeastern Wyoming, and western North Dakota.

Knife River flint

Knife River flint originates in Dunn and Mercer Counties, North Dakota, though cobbles can also be found in gravel deposits in the southwestern part of the state. It is typically brown, fine-grained, and develops a yellowish-white patina on exposed surfaces.

Because there can be a lot of color and texture variability in one lithic type, we will include multiple images when necessary to depict variations. Feel free to make suggestions as to how we can make the app useful to you. We will let you know when it goes live.

New Visitor Viewing Areas Added to our Archaeological Collections Tours

Every museum has education collections. In the Archaeology and Historic Preservation Division, these are collections of artifacts that we use to teach visitors about the human past. They may be scapula gardening hoes, stone projectile points, or tiny glass beads – basically any object that can help illustrate human behavior, interaction, and innovation in the past. These are the collections we use in educational programs, take to local classrooms, and allow people to handle and touch. This is important because so much of archaeology is tactile – that is, the feeling of the object in your hand is part of the process of identifying and analyzing it. For instance, you might have a hard time feeling the surface treatment on a pot, the smooth finish on a groundstone, or the grinding on the base of a projectile point if you were wearing gloves.  So this collection is an important part of teaching people how we make the dozens of observations that allow us to draw stories from objects.

But these collections are different from our permanent, accessioned collections in one important way. They have little or no provenience. Provenience refers to where the artifact came from (both the site itself and which part of the site). Provenience information is where we learn the artifact’s context – where the artifact was found in relation to other artifacts and features on a site. And context is what lends the artifact its research value. If I found an artifact on the ground and picked it up to take it home (or even to our museum to show someone!) without recording its exact location, I have essentially erased most of that object’s scientific research potential. This is why if you ever visit an excavation, you will see half the people digging and the other half diligently taking notes on everything they are seeing in the ground.

Without this information, we don’t know if (for example) the object was used at a bison kill site or a stone tool manufacturing site. An object taken from the floor of one earthlodge versus another earthlodge at the same site can tell us something about cultural identity or social interaction in a multiethnic community. A bone bead tells us a much different story coming from a Plains Village site than it does coming from a Paleoindian hunting camp.

Ideally, all of our artifacts would be provenienced and become a part of our permanent collection. But for those that aren’t, we can still put them to good use as part of our education collection. For instance, a few months ago I was starting to get a little bored with the tours I was giving of our collections spaces. I talked a lot about the types of things we curate and what they can tell us about North Dakota’s past. But they are all stored in boxes—this is great for the artifacts, but not very exciting for visitors! When tour groups walk in, the sheer number of shelves and boxes can give them a good sense of the volume of the collection. But being able to visualize the content of those boxes is much more difficult. Instead of asking people to just trust me that they were full of artifacts, I wanted to show them.

Storage room

One of the archaeology collections storage rooms.

So I started laying artifacts on a work table in that room before all of my tours. But that was inconvenient, because our staff needs to use that table frequently. That means I had to haul out the artifacts and put them back every time I gave a tour. Our simple solution was to use the new storage drawers that were installed as part of our expansion. Voila! With just a couple days of selecting, arranging, and labeling, Meagan and I were able to create a handy display of the types of things that are in all those boxes. We made separate drawers for groundstone, bone tools, stone tools, pottery, modified shell, and organics. Then for historical objects, we included everything from horse tack to buttons to toys to gun parts. The top drawers are for visitor viewing, and the drawers below contain similar (and unprovenienced) artifacts that our staff can just grab whenever they need them for educational programs.

Storage Drawers

Artifact storage drawers containing our new education collections.

Drawer of objects relating to child's play and toys

Education collection drawer of historical objects relating to child’s play and toys

Groundstone artifacts

Another drawer contains all groundstone artifacts, from grooved axes to stone beads.

Drawer of guns, gun parts, bullets, and ammunition molds

Another drawer contains guns, gun parts, bullets, and ammunition molds.

In addition to these collections, we are also putting together reference collections (made with provenienced artifacts) for researchers that range from ceramics to projectile point styles to military buttons to bullets.  Would you ever guess while you are walking through the galleries that all of this work is going on right beneath your feet in the lower level of the North Dakota Heritage Center & State Museum? I highly recommend that you come and see it for yourself!