Backstage Pass to North Dakota History

This blog takes you behind the scenes of the State Historical Society of North Dakota. Get a glimpse at a day-in-the-life of the staff, volunteers, and partners who make it all possible. Discover what it takes to preserve North Dakota's natural and cultural history.

Thousands Have Invested in Expansion Efforts – Thank You!

Hosting a “Recognition and Thank You Event” is a lot of work – at best a marathon of activity and outreach efforts. But all that fades into the twilight when you walk into a ballroom filled with more than 550 people who have come to help celebrate success. It is an extraordinary sense of accomplishment and a source of immense thankfulness and humility. Donors and supporters from all over the state converged at the Ramkota Hotel on April 24, 2014 for a very special evening honoring our donors and supporters - Touchstone Energy Cooperatives of North Dakota, A Kirk and Janet Lanterman, Governor William and Jean Guy, USDA US Forest Service Dakota Prairie Grasslands and Tesoro for the passport project, and the North Dakota Legislature. Together we all celebrated the expansion of the North Dakota Heritage Center and State Museum – the “Smithsonian on the Plains” – a regional, international destination – an architectural wonder.

Planning for this event began four years ago when we selected which organizations and individuals we would honor in 2012 and then in 2014. We had to visit with corporate executives and families to see if the dates worked – and in a number of cases they did not causing us to move honorees from 2012 into 2014 and even on into 2016. Nothing is simple.

Personal visits with all donors two years before the event set in place times for individual interviews and photo and video sessions. A four day photography tour across the Touchstone Energy territory was planned more than a year ago, with 4-6 stops each day at plants, offices and customer farms and community buildings. Interviews were coordinated and filmed at Basin Electric in Bismarck and Minnkota Power in Grand Forks – and even a couple of trips out of state were necessary to do executive interviews. All of these interviews and photos were incorporated into a photo tribute gift book, recognition publications, and an 18-minute video on Touchstone’s history – all part of the recognition event happenings.

The wonderful part of this process is the opportunity to get to know your donors and supporters more intimately – seeing their worlds and coming to understand their career and giving motivations. It is all worth the effort. The 2014 event was a success because we have taken the time to know our donors and appreciate their desire to make a difference with their gifts. It becomes very obvious that thousands of people have invested in the expansion and we are grateful for each and every one of those generous individuals and organizations! Thank You!

Jon McMillan, Foundation Board President, addresses hundreds of supporters who gathered to celebrate the Heritage Center Expansion.

Adventures in Archaeology: What does a Collections Assistant Do?

What does an archaeological collections assistant do? And (even more importantly) why? Here is a whirl-wind review of some of the things I am involved in and why!

I do a lot of cataloging, photographing, and labeling of archaeological artifacts. North Dakota has an estimated 12 million objects in its state archaeology collection! Unless we record these objects, have a way to identify them, and can find where they are stored, it is very difficult for anyone to study, learn from, look at, or enjoy our collections. This is my favorite part of my job. You never know what you might find next.

I also catalog paperwork relating the collections to the archaeological surveys and excavations from which they were recovered. This is important because the paperwork connects the artifacts to their provenience (where the objects were found). Knowing exactly where objects were found means we can learn things about people living in certain areas of North Dakota at particular times. And knowing exactly where objects were found in relation to other artifacts and features within a site means we can form a clearer picture of how people lived and interacted with the world around them. It makes the stories that the artifacts can tell us much more detailed.

Older collections are sometimes stored in less-than-ideal boxes and materials. In the past, objects were often stored in whatever was available at the time (including window flower boxes, cigar boxes, and old newspapers). We have learned over time that older acidic materials like these (even if they look nice) affect the objects stored in them--the writing on the boxes and bags fade away and the objects stored inside these materials start to crumble or fall apart. We don’t want to lose the collection information on the boxes and bags, and we don’t want to lose the objects themselves! So re-bagging and re-boxing artifacts in archivally stable (acid-free) materials is another big part of my job.

Left - Before: wooden post fragments stored in an unlabeled wooden flower box stuffed with newspaper (Photo by Wendi Murray)
Right - After: wooden post fragments stored in an archival box (complete with label!) and wrapped in acid free tissue for padding and support

I get to work with the archaeology volunteers too, and volunteering involves a fun variety of people and projects. The current main project is sorting objects excavated from the Larson Village site into material types so we can send them to specialists who can tell us more about them. I usually sort some of the smaller sized material, but there are amazing things to be found even there.

Left - A tray of small-sized unsorted materials from the Larson Village site
Right - Fun objects can come in small sizes!
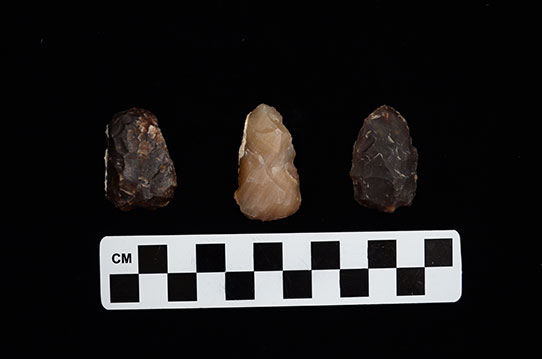
Top Row: a piece of copper, 2 biface or projectile point tips
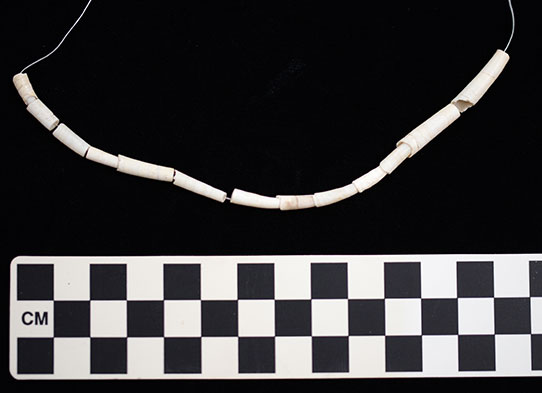
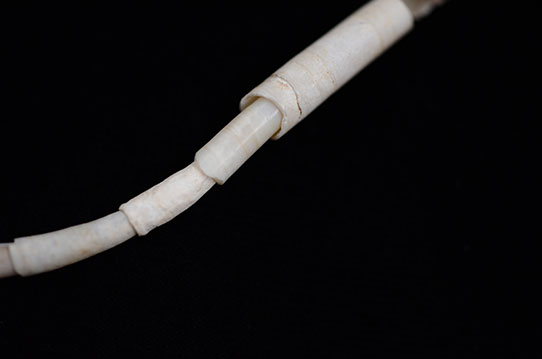
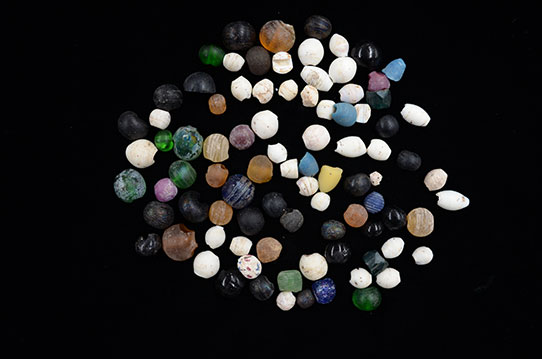
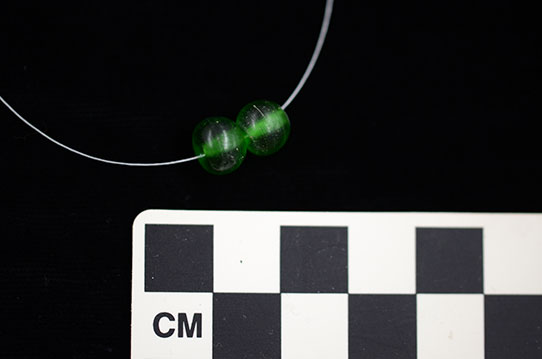
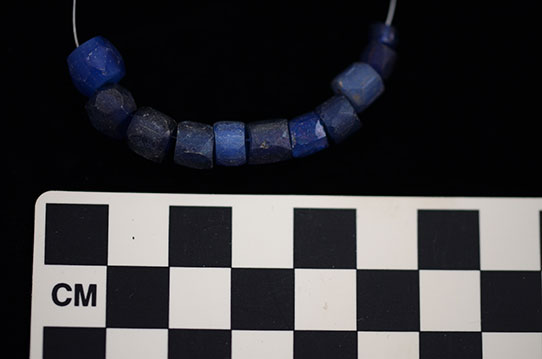
Bottom Row: part of a bone fish hook, (top) the tip of a stone drilling tool, (bottom) the base of a projectile point (“arrow head”), (top) a bone tube bead, (bottom) 2 glass beads

This is just one row in the new collections space.

There is a lot of variety in this job. The recent expansion project meant that a lot of time has been devoted to planning the layout, labeling the new shelves, and moving collections to the new storage spaces. One of the most exciting parts of the expansion process was being included in some of the new exhibits planning– there was a lot of proof-reading of labels and texts, documenting conditions of objects coming off and going on display, searching for new or different display objects in our collections, tracking the locations of objects, and carting objects to and from the old and new galleries. I love this because it means bringing collections out where people can see and learn about the North Dakota’s extensive past.

In summary, being an archaeological collections assistant involves a lot of documenting, sorting, and re-housing of artifacts. All this is done to help preserve North Dakota’s state archaeology collections and make them available for present and future use.

Moving Collections

Moving priceless objects can be daunting. Depending on the object, simply moving a rare or priceless object from one table to another or even shifting it a few inches or feet can be stressful. Moving thousands of priceless objects over 300 feet is even more daunting; moving priceless objects under a time schedule, even more so; moving priceless objects under a time schedule, through a construction zone, even more yet. However, with proper planning it can be done.

In the early days of planning the Heritage Center expansion it was quickly discovered that the State Fossil Collection was potentially in harm’s way with all the construction going on in and around the building. Not necessarily from a large piece of machinery or debris, but instead from possible exposure to the elements of nature (water and steeply fluctuating temperatures and humidity levels). Both of these elements can wreak havoc on fossils if not properly prepared for. After all the pros and cons of keeping the collection where it was versus moving the collection to an offsite storage facility were weighed and debated, the decision was made to keep the collection in place and protect the collection from any foreseen hazards to the best of our ability.

In this case water was our main concern. A minor concern was vibration from nearby heavy machinery. To protect the fossils from vibration, foam was placed in drawers and between fossils, cradling each fossil (figs. 1 & 2). To protect it from dripping water, the collection was completely covered in plastic sheeting (fig. 3 & 4). Fossils were also removed from the first 12 inches above the floor in case the storage room should flood. The storage room was heavily monitored for any sign of problems over the next few months. Meanwhile a new storage room was being completed and filled with new, state of the art cabinets and storage compactors to house the important collection (fig. 5).

Finally moving day arrived. Due to all the things needing to be done our window to move the collection was small. A team of paleontologists and skilled volunteers moved thousands of fossils over the course of a few days, reorganizing the collection as we moved it.

The project has been completed and the collection receives routine and ongoing maintenance and organization.

Fig. 1 – Paleontologist Amanda Person (left) and paleo intern Samantha Pounds (right) placing foam padding between fossils.

Fig. 2 – Paleontologists Becky Barnes (left) and Amanda Person (right) placing foam padding between fossils.

Fig. 3 – Paleontologist Becky Barnes securing plastic sheeting on top of metal cases containing the ND State Fossil Collection.

Fig. 4 (left) – Metal cabinets containing ND State Fossil Collection covered in plastic to protect from possible water damage.
Fig. 5 (right) – The new cabinets holding the important ND State Fossil Collection.

And Now for Something Completely Different

Objects connect us to our communities, our culture, and our history through the stories they help us tell. There are a lot of great techniques to spark fresh thinking about these objects and stories, and to help us become fully engaged in this process. In order to demonstrate a few of these ideas, I picked a random object from a colleague’s desk. It’s a tiny ceramic dinosaur, hand painted in shades of brown, green, and yellow.

Ceramic Dinosaur

First we can try out a standard description: Hand-painted ceramic dinosaur. It’s factual, but maybe a little dry. This is a good starting point, but we can take it further. Next, let’s think about writing an exhibit label for this little guy. The type of museum, and their mission, helps determine how an object is interpreted. A label in a children’s museum might look something like this: How did a Stegosaurus protect itself from other dinosaurs? A label in a science museum might look a bit more like this: Stegosaurus is a genus of armored stegosaurid dinosaur. A history museum might produce a label more like this: This ceramic dinosaur was made by the Whiteclay Pottery Company from 1904 to 1922. Not only does the museum type and mission matter, but we also need to know who our primary audience is going to be. First graders, college students, and paleontologists are each going to have different expectations of a label. Understanding our mission and audience make a big difference for what kind of text we create. We’ll have to work hard to make sure we are engaging as diverse a group as we can.

Other methods of writing about an object might seem a little silly, but they still serve an important purpose. Most importantly, we can push ourselves to go in new directions. Writing a short story about an object or in first person from the object’s perspective is a great activity to use with kids. Working individually or in groups, have them create a story for the dinosaur. We can also use this to incorporate several topics into a project including history, science, math, and art. We could use these techniques to focus on Stegosaurus anatomy, learn about the artist who created the dinosaur; or even to learn about how pottery was created in a particular community.

Now we can try some other creative writing techniques. Write a diary entry, a song, a play, a haiku, a limerick, or other poem either about the dinosaur, or from its perspective. Let visual learners paint a picture of the dinosaur. Have kids get up out of their chairs and move around like dinosaurs. Try tweeting as your object:

Stegosaurus @realspikes - 5m
Check out my show at the Met this weekend: Disarticulate This!

#meteoric

Museum professionals and teachers incorporate seemingly odd techniques like these with great results. These methods can be used with virtually any object in a museum collection, in a classroom setting, or from amongst family heirlooms. Even serious stories can be related through more creative thinking and engaging methods. Think about the endless stories a typewriter could tell—about people from your community (who used it); about businesses in your community (how was it used); and even about changing technologies (what came before it, what came after it). The only limits here are the ones we set for ourselves.

Potential Acquisitions

The Museum registration department is responsible for new acquisitions to the state’s museum collection, incoming and outgoing artifact loans, creating and upholding museum collections policies and procedures, and keeping track of the collections with regular inventories and database updates.

Does the Museum Division accept donations for the collection from the public? We receive about two hundred offers of various objects to the state’s museum collection every year. These collections may be one object or a hundred objects, and the items range from tractors to paintings to taxidermy. The Museum Collections Committee (MCC) meets twice a month and consists of staff from various fields including the museum collections care, exhibits, education, and historic sites, along with input from geologists, archaeologists, and others when deemed necessary. The MCC proposes to the Museum director what we should or should not accept for the state’s museum collection, with the Museum director making the final decision.

How does the MCC decide what to accept and what to decline? We ask potential donors to fill out a Potential Acquisition Questionnaire, found on our website at http://history.nd.gov/donate.html. We want a detailed description of the objects, what is known about them, and how the items are related to North Dakota. The stories that come with the objects are just as important as the objects themselves. We ask our donors to provide as much information as possible about their donations and, if they exist, provide related photographs and documents in order to provide context. The objects being offered are then compared to the current museum collections. If we do not already have similar objects with similar stories, and we are sure we can properly care for the objects, we most likely will accept the offer.

If a donation is accepted for the museum collection, the donor signs a gift agreement that transfers legal ownership of the objects to the State Historical Society of North Dakota. Once we have a signed gift agreement, we arrange for transportation of the donation. We prefer not to have possession of any objects before the state actually owns them.

Although we cannot guarantee donated objects will go on exhibit, we do guarantee that your donation will be cared for to the best of our abilities. In addition, all objects are available to researchers and sometimes to other museums as a temporary loan. When museum studies interns are available, one of their projects is to create an exhibit case in the State Museum called “Recent Acquisitions” that showcases a few acquisitions from the previous year. The case currently on display includes a mailbox, a 1970s Milton Bradley board game called Sub Search, a cell phone, and a Boy Scout uniform. In the future, we will use this blog as a way to show additional recent acquisitions to the collection.

Below are three examples of recent acquisitions:

Grizzly Adams doll from the collection of the Ruth M. Haugen Ekland Estate. 2013.102.26

The doll, or some may call it an action figure, was part of a large donation offer of household items, children’s toys, and farm equipment from northeastern North Dakota. Grizzly Adams is a popular generational figure remembered by many from their childhoods.

Clell Gannon artwork donated by Carolyn Twingley. 2013.111.205

Clell Gannon was a North Dakota artist.  He not only created murals for the exhibits at the Liberty Memorial, the State Historical Society’s previous home, but also designed the Oscar H. Will & Co. seed catalog covers for many years.

Soft cradle donated by Elizabeth Cantarine. 2013.122.1

The soft cradle was made by the daughter of Andrew Ireland (Mary Comes Last) from Cannonball, ND. It won first prize for beadwork at the Fort Yates Fair in 1932. 

Any request to use the images should be requested by completing a “REQUEST FOR ONE-TIME USE OF PHOTOGRAPHIC IMAGE” that can be found at: http://history.nd.gov/pdf/request_for_one_time_use.pdf

“You Mean, We Already Had A 'Triceratops'?”

In the previous Corridor of Time exhibit, there was a 6 foot long skull that for the most part went unnoticed. How is that possible? I’m glad you asked! It shared a platform with two Dromaeosaurus, and sat about 4 feet off the ground. The jacket (the plaster & burlap surrounding the fossil) was placed flat into the surface. It was a view most people were unused to seeing such a large skull in, and so it was overlooked.

In the new Adaptation Gallery: Geologic Time, that problem has been solved. The skull now sits propped up, surrounded by rock, and extremely visible next to our full-size Triceratops skeleton cast. This is the story of how it got there.

When the original display was dismantled, we had two main goals. First we needed to do additional restoration of the skull. Second, we had to figure out how to better display it. In the time between the original skull restoration many years ago, and preparing for the new exhibit, our paleontology lab had acquired new tools for cleaning, one is called a microblaster. Think sandblaster, only using baking soda instead. Why baking soda? Well, if you look at the particles under a microscope, you will see they’re actually pointed and jagged – but not so abrasive as actual sand. Generally fossils we clean with the microblaster are placed in a blasting box with a filter hooked up to collect all the dust. The Triceratops skull was much too large, and too heavy, to fit inside even our largest blasting box. We had to create a makeshift shield that would collect the wayward dust, and not spread it everywhere… We succeeded, and removed the last bits of dirt (which we call matrix) from around the bone, exposing the beautiful natural chocolate color of the fossil.

The skull is so fragile and heavy, there isn’t a good way to remove it from its plaster jacket cradle. So, to display the fossil, we would have to include all the plaster and wood frame that supported it. Some of our display bases and forms were created by an exhibits company, including the metal frame that now hides below the skull, propping it up. We couldn’t just leave it like that however. Wanting to draw attention to the fossil, away from the support materials, we decided to build a fake rock wall around it. It needed to be light, yet durable, and still look like rock. This took a many-step process of measuring, creating a pattern, cutting the pieces out of foam, making sure they fit, then covering the whole thing with a sculpting epoxy. Adding difficulty to this process is the fact that the skull, now in its permanent home, was upstairs in the new gallery, and our fabrication area for building the wall was downstairs!

With the rock wall now painted and in place, the Triceratops skull looks like it is nestled in the rock outcrop it was originally excavated from.

Moving the "Triceratops" skull with a forklift – people at the ready to help hold it in place.

The skull is in place! This is why it needed a little faux-rock makeover.

The guts of the rock wall – insulation foam, sculpting epoxy, sand, and paint.

Nearly complete – just needs a dab of paint.

Fossil skull and rock wall (right) next to "Triceratops" skeleton cast (left).