Backstage Pass to North Dakota History

This blog takes you behind the scenes of the State Historical Society of North Dakota. Get a glimpse at a day-in-the-life of the staff, volunteers, and partners who make it all possible. Discover what it takes to preserve North Dakota's natural and cultural history.

Fixing the Mold: Painting Models of Fur Trade-Era Rifles

The education team at the North Dakota Heritage Center & State Museum is working to develop a fur trade program similar to the “Red River Rendezvous” interpretive program created at the Pembina State Museum. The Pembina program uses a pair of muskets that a former site supervisor at the Missouri-Yellowstone Confluence Interpretive Center manufactured. He hand-carved a model and formed several silicone molds, which he tested before pouring the resin to create the rifles for Pembina.

I paint tiny, nerdy things. One of the side effects of this hobby is that people often mistakenly think that because I paint little plastic figures I can paint larger things as well. During my 12 years of painting, I have learned a lot of tips and tricks, but these do not always translate to larger items. Nevertheless, I volunteered to take on the task of fixing up and painting a couple of miscast test models for the ND Heritage Center program, which was a worthy challenge.

The rifles were so long I could not use my regular painting table and had to prepare a special workspace for this project.

The problems with these rifles arose from the molding process. Mold lines are a common feature of any molded item. These lines are a byproduct of the casting process. As the two halves of the mold come together, gaps or misalignments can cause lines to form at the halfway mark. Besides the mold lines, air bubbles in the resin had caused pockets and holes. I needed to trim the tip of the rifle barrel as one half-circle section was longer than the other. Oh, and one of the rifle’s sights was missing.

Mold lines running down the middle of the rifle’s barrel. The gun was also missing the sight and had many scuff marks.

Here, air bubbles in the resin rose to the surface and left holes during the casting process.

To fix these issues, I started with an Exacto knife and trimmed the barrel to make it even. I also scraped away mold lines to make the join line as smooth as possible. Unfortunately, I could not completely eliminate the mold lines without potentially damaging the desired shape of the rifles. I would try fixing these in the painting process using an acrylic resin. I had to turn to a different tool and skill set to address the air bubbles and missing sight.

In the world of miniatures, there is a substance called “green stuff.” Its actual name is Kneadatite. Green stuff has two parts—a yellow filler and a blue hardener. Mixing the two parts produces a sticky green modeling putty with unique properties often used for filling gaps in miniatures. Before 3D sculpting with computer programs like Blender or ZBrush became common in manufacturing miniatures, green stuff was the medium of choice for skilled artisans to sculpt original miniatures. While most of my green stuff work was filling holes, several areas required a bit of sculpting, such as the missing sight. With most of the problem areas fixed, it was time to prime and paint. A quick spray of brown primer got these rifles ready for my brushes.

Kneadatite before being mixed.

A fresh batch of green stuff ready to fill air holes and fix other imperfections in the rifles.

Using a silicone sculpting tool, I smoothed the green stuff into place, so it looks like it always belonged.

A close-up as I push green stuff into the same holes as above.

Lovely spring weather allowed for outdoor priming.

My biggest challenge when painting large items is making them look real when viewed up close. I have tricks for painting 28 mm scale wood grain, but those don’t work on life-size models. One of the education team’s first decisions was that we did not want to make the rifles look too real. This program might travel to schools, and we wouldn’t want to cause alarm. It is also one of the reasons we did not include the trigger and firing mechanism on the finished product. These were also the parts most likely to break, according to the staff at Pembina.

The paint process for the metal was pretty simple. I applied a base coat of silver followed by a technique called shaded metallics, which you can read all about in a past blog post about painting patina. This gave me a nice worn metal look. I followed a similar process for the brass. Trying to find the right color for the wood on the rifle took some thought and looking at lots of reference images. In the end I found a medium brown color from Vallejo Acrylic Paints that worked for a base coat on the main body of the rifle. I added a few other colors to create wood variations on other parts of the rifle. Then I ran into a problem. In my original plan, I wanted to use a brown ink to help shade in the wood’s nooks, crannies, and crevices. After completing one side, I could tell I had made a terrible mistake on the first gun.

The rifle on the left has had the shaded metallics treatment applied; the one on the right shows what the metal looked like beforehand.

I used a thinner coat of brass on top of the darker metallic undercoat to make it look worn.

In my years of painting, I have taught several individuals how to paint miniatures. One of the first things I always tell them is that most painting involves fixing your mistakes. You will mess up at some point, but everything is fixable. For this project, all I had to do was repaint the wood color and fix where the ink had dripped down and across my completed gun barrel in a couple of spots. The only thing lost was the time spent redoing those sections.

The next problem I needed to overcome was the butts of the rifles. The rifles at Pembina State Museum either had another piece that we made to cover the gun butts or were finished to look that way. After pondering the issue for several weeks, I found examples of trade guns with the stock wrapped in leather. At first that seemed easy enough to pull off, and I even went out and bought supplies. But I soon realized that I was out of my depth. A quick phone call later, I recruited the best seamstress I knew to help me. And all it cost me was bringing one of the grandkids along.

This decision proved one of my best. With my mom’s help, we created a pattern and cover. She also had a much better selection of leather pieces than I could find at the store. So we were able to come up with something we both thought worked well.

With the help of reference photos and the sewing expertise of my mom, we were able to cover the gun butts with faux leather.

My son, Calvin, takes a break from playing with Teenage Mutant Ninja Turtles from my childhood to help me try some weathering on a spare piece of leather.

With the covers completed, I only had one step left. I needed to add the classic trade gun decoration of brass tacks. The tacks were cast separately for the original program rifles and later glued into place. I admit it was probably the fastest way to complete this task, but casting resin is not a skill I have learned—yet. I went with what I knew and used real tacks. With a pin vise tool, I drilled small holes into the rifle. I tried to match patterns I had seen in different reference photos. A small problem arose with my tacks being longer than I could drill into the rifle, so I snipped the ends. After a drop of glue to secure each tack, I could finally call this project done.

A pin vise is used to drill holes into the rifle.

Overall, this was a fun challenge. Plus, it is always great to help with any project that improves the offerings of the State Historical Society of North Dakota. I estimate I spent close to 20 hours on this project. All of it was worth it. These rifles will be used in Medora at the Chateau de Morès State Historic Site as part of an August teacher workshop that we are presenting on trade and transportation. Be sure to sign up if you are a teacher and want to see these rifles in person.

My completed masterpieces with brass tacks in place.

Why is Egypt in North Dakota?

One day while I was working at the State Archives, a patron approached the reference desk and asked me why Little Egypt Park, located in Williams County, was called Little Egypt? The person was interested in finding out why and how the park ended up with that name. I was intrigued myself, as I couldn’t think of any historical or geographical reasoning behind the name and set to work searching through various resources at the State Archives. This is what I found.

Little Egypt Park, located 30 miles south of Ray on Lake Sakakawea, features picnic areas, camping, and direct access to the lake so visitors can boat, fish, and swim at the park as well. In the late 1980s, plans were made to improve the park by creating a swimming area and bathhouse as well as upgraded picnic shelters and camping areas. And that’s all I was able to find. I looked through the State Archives resources I knew of, including “The Wonders of Williams: A History of Williams County, North Dakota,” local newspapers, and collections relating to parks and the creation of the parks, with no luck. This was odd, since it is common to find information about a park’s origins or name significance in our collections. Feeling stumped and not sure where else to search, I asked other State Archives staff members if they had any ideas, perhaps they had researched Little Egypt Park in the past. Shane Molander, the state archivist, reached out to State Historical Board member Richard Stenberg, an associate professor in the Arts and Human Sciences Department at Williston State College, with my question and provided me with the first lead I had so far: The old-timers in Williams County would say that the land had good soil or dirt. But what was the connection?

an aerial view showing water on the left, then sand, and then land.

The sprawling Little Egypt Park on the shores of Lake Sakakawea. Courtesy Williams County

This research got me thinking about how and why place names were chosen during European immigration and settlement in the Midwest and Western states. The capital city of Bismarck is famously named in honor of German Chancellor Otto von Bismarck. A settlement in Traill County was given the name Little Chicago, and later in Dunseith, Little Chicago of the West was formed in the hopes that it would soon rival the city in Illinois. Towns across the Midwest were named Little Norway or Little Sweden by Norwegian or Swedish immigrants. So what inspired the people of Williams County to choose Little Egypt as their new park’s name? Continuing my search, I started looking for places named Little Egypt outside of North Dakota to see if any other information could be gathered about this interesting place name.

Remember Little Egypt. Down in Southern Illinois is a tier of counties once noted for their wonderful soil. The soil was so praductive, so much like the fertile Nile Valley, that the region was nicknamed LITTLE EGYPT. The soil had one fault. It gave up plant food too readily. Agricultural authorities warned against depleting it. They urged crop rotation, diversified farming and the use of fertilizer. BUT the farmer wouldn't listen, he was getting good money for bumper crops. The merchant wouldn't listen, his cash register was full of the farmers good money. The jobber wouldn't listen, he was too busy filling the merchants orders. And the manufacturer, why the very idea of bothering HIM with such a trival matter. He was a BUSINESS man, not a farmer. AND THEN the soil gave out. It couldn't stand the pace. It had been robbed. Now they are trying to restore it. But it's a slow job and will take generations. The Northwest needs the message of the National Dairy Exposition; the Show needs your support. Let's go! Capital $500,000.00 The RE Cobb Co. Devils Lake, N. Dak.

I came across this advertisement during my search for Little Egypt place names. The Devils Lake World, October 4, 1922, p. 15

Southern Illinois is nicknamed “Little Egypt,” with several towns in the southern half of the state named after Egyptian cities. This nickname was inspired by comparisons of the geographic features of the Mississippi River and flood plains of southern Illinois to the fertile Nile Valley in Egypt. Poor harvests in the northern regions of the state also contributed to this nickname, as the land in southern Illinois provided food relief to the struggling north during the winter of 1830-31.

Suddenly the dots began to connect. The “good dirt” that the old timers in Williams County thought the name came from could have been an allusion to the fertile soil found in that region of the county or to the fertile soil they hoped the region would have. The name also evokes the feeling of a prosperous community, like the settlers in Little Chicago would have wanted. Or perhaps people from southern Illinois settled in Williams County and chose to name the park after their home in Illinois. One single answer may not exist with multiple inspirations possible. But as it doesn’t appear the reason for the name was recorded, my quest continues.

“Our Heritage” Videos: Showcasing the State Historical Society of North Dakota’s Collections

The State Historical Society of North Dakota has over 14 million artifacts in its museum, archives, and archaeology collections. That’s a lot! To showcase more of these, we’ve started a new video series called “Our Heritage.” Each month’s video features artifacts related to a prominent North Dakotan, historical topic, or related theme and are presented by a member of our staff who’s an expert on or has a passion for the subject.

Our Heritage is typed over many historic images from North Dakota.

Our first video, which premiered in January, focused on Fannie Dunn Quain, North Dakota’s first licensed female physician. Sarah Walker, head of reference services in the State Archives, pulled the Fannie Dunn Quain papers from the collections to discuss and show who this trailblazer was.

Next up was a two-part video with Security Supervisor David Schlecht highlighting some of the firearms in the museum gun vault. This represented just a small sampling of the more than 500 firearms in our gun vault. We feel very lucky to have a Smith & Wesson Model 320 Revolving Rifle with a 20-inch barrel since only about 244 of these were ever made.

April’s video was very timely and my personal favorite so far as I had no idea at least three passengers on the RMS Titanic had ties to North Dakota. Here, Head of Reference Services Sarah Walker tells the stories of Ole Ableseth, Herbert and Carrie Chaffee, and Johannes Nysveen. An audio clip from Ole Ableseth talking about his experience on the Titanic will be sure to pull at your heartstrings.

Our newest video, scheduled to be published May 21, features Captain Joseph Enright, the officer credited with sinking the largest warship by a U.S. submarine. Learn more about Enright from State Historical Society Director Bill Peterson and see some of the pins he received for his service in the U.S. Navy.

We really enjoy making these videos and hope you enjoy watching them and learning more about our collections. See the videos at youtube.com/user/SHSND. We won’t tell you what videos are planned for the next few months, but we will say one will be with multiple people from different departments within the agency discussing artifacts related to the chosen topic. It will be a great collaboration!

The Magic of Interlibrary Loans: Accessing State Archive Microfilm Resources From a Distance

screenshot of WorldShare's website

Screenshot of OCLC WorldShare, which is one way a library can submit a request received from a researcher for microfilm holdings at the State Archives.

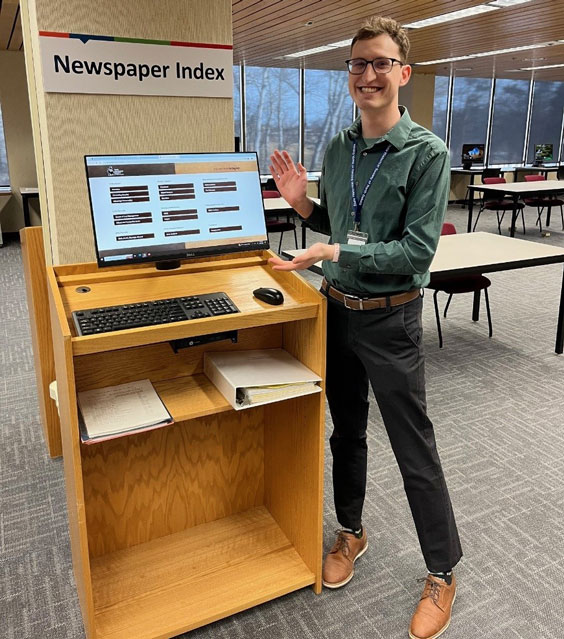
Spring has descended on the Bismarck area after a relatively calm winter for us, and with summer’s approach our busy research season is about to come to the State Archives. While we have patrons throughout the year, we tend to get more visitation in the summer months with folks coming to tackle their family history projects or researchers working on that next book or article on a given topic. While most of our collections are only accessible in person in the reading room, interlibrary loans do provide access to many microfilm resources from afar.

Some may be familiar with these services from their local libraries, whether public or affiliated with a college or university. Such loans allow staff to request material the library does not have in its collection from another library, which then loans it to the requesting library to allow the patron access to it for a specified period. With lending libraries, whose materials typically are meant to circulate, such loans are a routine service. At the State Archives, our material is usually not meant to circulate, but some of our researchers are not able to easily come to Bismarck to research in person. If they need access to North Dakota newspaper resources beyond a search for a specific obituary or other article, this is where interlibrary loans come in.

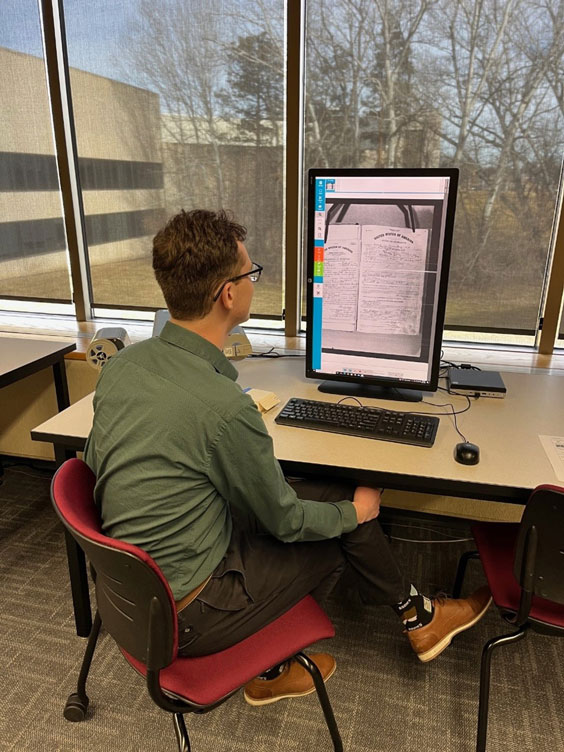
Our microfilmed newspapers are a popular resource for researchers on a variety of topics and projects. While our digital offerings of newspapers are expanding as resources allow on sites such as Chronicling America and Advantage Archives, many newspapers are not yet digitized, so microfilm is the way to access these.

How does one submit an interlibrary loan request? Contact the appropriate staff at your nearest local library (public, college, or university) that has a microfilm reader available and is willing to facilitate the loan. They submit the request to us, and we either fulfill it by sending the microfilm in the mail or let them know we are unable to fill it at this time. The loan period is 30 days and can be renewed for an additional 30 days unless there is a need for the film to be returned, in which case we would notify the library. We do charge a fee of $4 per roll to libraries in the United States to cover postage and other costs associated with the service. Library staff can submit requests via OCLC WorldShare, which is an online portal many libraries use to submit ILL requests, or they can email us the request directly to archives@nd.gov. We also loan to Canadian libraries, though this incurs an $8 charge per roll because of the increased costs involved.

Some restrictions to this service exist. We loan a maximum of five rolls at a time to a patron. The rolls must stay within the requesting library facility. Also, not all our microfilm rolls can be loaned, but we do let researchers know when they reach out to us regarding a particular resource. And we are unable to loan outside the United States and Canada.

screenshot of an interlibrary loan request in Re:discovery

All interlibrary loan requests we receive at the State Archives are logged into Re:discovery as well.

So if you can’t make it to Bismarck, consider giving interlibrary loan a try. We have sent dozens of rolls to libraries across the country and to Canada, averaging 75 loan requests per year. We are happy to help libraries and work with them in providing this service to access one of our more widely used resources. Newspapers are a great window into our past, and you can access most of ours via your local library if needed. Give it a try!
 

Making Pemmican at the Pembina State Museum: The Food of the Fur Trade

When fresh, pemmican has a waxy, gritty texture and a fatty, beefy flavor. While pemmican can store indefinitely if kept dry, its flavor does not improve with age.

Pemmican is a food made of a mix of dried meat and fat. As George Colpitts notes in his book, Pemmican Empire: Food, Trade, and the Last Bison Hunts in the North American Plains, 1780-1882, the name came from the Cree word pemigan and means “he makes grease.” The grease came from bone marrow and was mixed with harder fats by Native Americans to produce traditional pemmican, sometimes referred to as sweet pemmican.

Two types of pemmican were commonly made foods. Sweet pemmican consisted of a mixture of more palatable fats, including bone marrow grease and unsaturated fats, which made it softer and more palatable than its more prolific counterpart, trade pemmican. It was prepared with care using the best meat and fat. Dried fruit was sometimes mixed into it. For instance, in the Red River Valley, the highbush cranberry, also known as the Pembina berry, would have been added.

Trade pemmican, by contrast, was a hurriedly mass-produced food made by Euro-American and Métis fur traders from whatever was most accessible. It contained more saturated fats and was thus much harder. It often contained other ingredients such as fur, bits of bone, or even bark, which inadvertently found their way into the mix during processing. Despite its rough and unappealing taste and texture, the calories packed into every pound of pemmican helped to drive the fur trade.

Fur traders first came to Pembina in the 1790s to hunt beavers. By 1804, they switched to hunting bison for meat and making pemmican to feed fur traders who operated in the far north of Canada. The Métis quickly took over the pemmican industry, dominating in the middle 19th century with their annual bison hunts at Pembina and Walhalla, then called St. Joseph. Pemmican was so important to feeding people working and living in the Red River Valley that in 1814 the Pemmican War broke out between competing fur trade companies and their allies when the governor of the British territory of Assinaboia (modern southern Manitoba and the Red River Valley) tried to forbid its export. The pemmican trade, like much of the industrial fur trade, ended when bison herds were hunted to near extinction in the late 19th century, a problem exacerbated in part by intensive bison hunts of the Métis pemmican trade.

Despite reading about pemmican in the accounts of many writers who described it in varying degrees of admiration or derision, I still didn’t know what it tasted or looked like. So I embarked on some experimental archaeology to find out. Having no easy access to bison bones, I made a version of trade pemmican, though I left out the fur and bark. I used beef fat since the butchers near me did not carry bison fat. Though bison was historically the most common meat base, pemmican can be made with the meat and fat of any animal, even wild game or fish.

I started with dried bison, which to me tasted almost flavorless but slightly gamey. Adding some beef fat, the dish tasted like fatty ground beef with only a hint of the bison, but the texture is that of a wax candle mixed with gravel. That may not sound appealing, but at almost 4,000 calories per pound, pemmican couldn’t be beat as a source of shelf-stable nutrition in the 19th century.

Two pounds of raw meat and a ½ pound of suet. The meat will reduce to a quarter of its weight when dried, leaving ½ pound of dried meat and ½ pound of suet for 1 pound of pemmican.

If you are up for an adventure and want to make your own pemmican, you’ll need only two or three ingredients:

  • 2 pounds of raw meat (bison or beef), as lean as can be found
  • ½ pound of suet or fat (bison or beef)
  • 1 cup of finely chopped dried fruit (optional)

Begin by cutting the meat into strips as thin as possible. Cut against the grain to make the meat dry faster and easier to pulverize later. Lay the cuts of meat on a wire rack. Place the rack on a baking sheet to catch any errant fat drips.

Cut against the grain to dry the meat faster and make it easier to grind.

Set your oven to the lowest possible temperature—for me that was 175 degrees Fahrenheit. Bake the tray of meat in the oven for 10 to 12 hours. The historical method of drying meat was to hang it outside in the sun for one or two days. The hot sun and prairie winds would desiccate the meat and dry it into jerky. Smoke and fire were sometimes employed to aid the drying process. A more hygienic option is to use an oven or dehydrator.

The dried meat should be brittle and tear apart easily. Place the dried meat in a food processor or blender and use the pulse setting until the meat is mostly ground into a stringy powder; a few remaining small chunks are fine. The longer you process the meat, the finer it will become, which will improve the texture of the final product. If you are including dried fruit, now is the time to mix it thoroughly into your ground meat.

Grind as fine as you wish. Sweet pemmican would have been made with meat pounded into a literal powder. Trade pemmican would have been rougher, which is what I ended up making here.

Next render the fat in a saucepan over medium-low heat. With a metal strainer or spoon, remove any chunks that do not melt so only liquid fat is left. Pour the fat mixture over your ground meat and begin mixing it together with a spoon. Once cool enough to touch without burning your hand, begin mixing by hand to cover everything thoroughly in fat. It is best to wear gloves while mixing. After mixing, but before the fat has set, you may choose to pour your pemmican into a muffin tin or other shaped dish. Let the mixture rest until it has fully hardened.

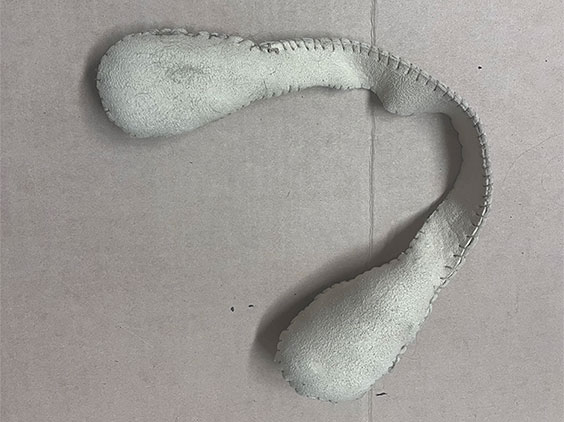
Pemmican when kept dry has a shelf life measured not in months or years but in decades, though added fruit will shorten it. Historically, pemmican was stored in bags made of bison hide with the seams sewn with rawhide and coated in tallow to keep air and moisture out. A freezer bag or plastic container will suffice to store your pemmican. You may choose to refrigerate your pemmican, but it is not necessary. I made a bag from rabbit fur purchased at the Pembina State Museum store, and my pemmican has kept without refrigeration for over a year. The pemmican is still gritty and a bit unpleasant to my taste buds but completely edible and should remain so for many years.

For added flare, I bought a rabbit fur and sewed it into a pocket to more authentically store my pemmican. You may prefer a plastic freezer bag.

Snail Mail Past: Historical Stationery From the State Archives Inspires Director’s Letterhead

I cannot count all the ways people can send an electronic message to one another these days. Email, text, Facebook Messenger, LinkedIn, Teams, Zoom, Twitter, direct message—the list seems endless. Even the once exalted method of the telephone has receded into a dim, distant place behind these other forms of messaging. People now regularly text me to see if I am able or willing to take a call. While most days I don’t feel particularly old, I fondly remember dial phones and the excitement of coming home to a blinking answering machine light! That all seems like ancient technology to me now.

On a personal level, I rarely see regular mail these days. I get forms and reports for review at the office, but personal mail is mostly just bills and junk punctuated a couple times a year with holiday or birthday cards. Truth is, I have received very few handwritten letters in the mail lately. But when I do get them, I treasure them. Before I came to the State Historical Society, I found that writing to other people the old-fashioned way—with paper, pen, and in cursive—brought me great joy. It turns out that it brought much happiness to the recipients of those letters as well. A couple of my friends confided that the letters meant more to them than I could have imagined.

My letter-writing habit got me thinking about stationery. I often used blank note cards or plain paper. But I wondered if something slightly more personalized might also fit the bill when it came to designing my director’s letterhead. I believe that answers to most of our issues in life can be found by looking back at our history. Most people think of archives as simply a way to source the past, but our State Archives contain thousands of examples of the very best historical graphic design as well. To this end, I asked Sarah Walker, head of reference services, for examples of stationery in our collections. Walker and Lindsay Meidinger, head of archival collections and information management, then served as sounding boards as I sifted through many samples. Just as I had suspected, I was richly rewarded with a plethora of beautiful, artistic, elegant, and professional examples of stationery that made me long for the days past when we communicated with each other by setting pen to paper and writing. TBH, BTW, NGL, those were the days—the days before we communicated primarily in emojis and acronyms! SMH.

A couple of the best examples I found included the stationery of the Lesmeister & Son Automobile Garage in Selz, North Dakota. I loved the graphics in this one with the old cars and the color. It just hollers “adventure.” I also liked the work on the Dakota Territory Centennial Commission stationery and other examples of company stationery that highlighted the organization’s officers. The Bismarck Diamond Jubilee graphic used the original streetscape of historic Bismarck to cleverly cast a shadow of the future Bismarck. What brilliant graphic design and use of color in that one! The steamboat and subtle other nuances in that letterhead caused my gaze to linger. Many businesses’ letterheads contained renderings of their buildings, indicating a great source of pride by the sender in the places they worked.

Lesmeister & Son Automobile Garage stationery, circa 1918. SHSND MSS 11354

Stationery made for Bismarck’s Diamond Jubilee celebrations in 1947. SHSND MSS 11354

Dakota Territory Centennial Commission stationery, 1961. SHSND MSS 11354

After looking at a few of these, Dannie Dzialo, a talented graphic artist who also works in the State Archives, and I sat down to discuss things we liked or didn’t like about the archived stationery. Reference staff also weighed in on what was attractive to them. And then we thought about a few things that are important to me. After some back and forth, Dzialo submitted the finished letterhead, which includes images of the state Capitol and ND Heritage Center & State Museum as well as the names of the agency’s departmental directors, people with whom I am honored and proud to be associated. These elements are mixed with a few others that have deep meaning to me, including, of course, my faithful Labrador retrievers and a steamboat, an expression of my early love of maritime and North Dakota history. 

My new director’s stationery reflects my love of North Dakota history as well as other elements from my past with deep meaning to me.