Backstage Pass to North Dakota History

This blog takes you behind the scenes of the State Historical Society of North Dakota. Get a glimpse at a day-in-the-life of the staff, volunteers, and partners who make it all possible. Discover what it takes to preserve North Dakota's natural and cultural history.

The Challenge of Traveling Exhibit Programs

When asked about the most challenging part of my job, the first thing that comes to mind is always the traveling exhibit program that circulates to some of the state historic sites our agency manages. While the exhibits staff writes labels, designs gallery layouts, and manages exhibit components, it is my role to care for the artifacts that go on display, from initial selection to final installation.

By the time I join the development process, a preliminary list of artifacts has been chosen by the exhibits staff. Often the items selected have not been examined in the recent past and important details such as size and condition are missing from our electronic database. A basic, bare-bones database entry can make something seem like a great choice for an exhibit, but sometimes upon actually seeing the artifact, it becomes clear that it won’t work. One example is a whale bone that, in the database, sounded like it would fit in my hand. When I actually found it in storage, it ended up being over six feet long! As we’re going through the process, we occasionally encounter unexpected situations that require us to adapt the original concept behind a case.
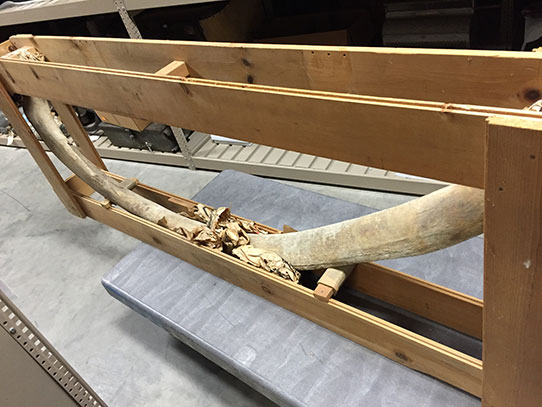
Whale rib

Sounding through a database description as though it could fit in the hand, this whale rib was planned for inclusion in an exhibit case. When I actually found it back in storage, it was over six feet long! We occasionally encounter unknown problems during the exhibit development process—sometimes due to size, but more commonly due to condition issues that make it unsafe to display an artifact.

Once artifacts are selected and assembled, I update all the information in our database. I take photographs of everything going on display, in addition to taking measurements and writing condition reports. All of this provides a baseline for an artifact’s condition before it goes on exhibit and would make it easier for us to recover the item should it go missing.

The exhibits staff and I work together on mock case layouts here at the ND Heritage Center. Using outlines that match the size of the exhibit cases at the site, we take the artifacts assigned to each case and, through a process of trial and error, arrange them in a way that is visually appealing while not causing damage. Once a layout is decided, any special exhibit mounts are prepared, and then I pack the artifacts for transport.
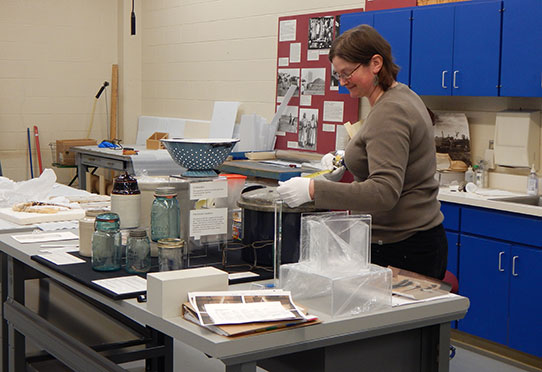
Mock case layout

Curator of exhibits Genia Hesser works on a mock case layout here at the ND Heritage Center. We need to ensure that artifacts will actually fit into the space provided and figure out if artifacts require supports or mounts. It is best to determine all of that prior to actually traveling to one of the historic sites, which are often very far from the resources we have in Bismarck.
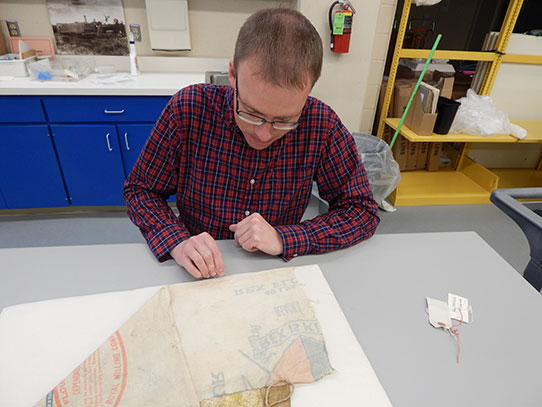
Fabricating special mount

Some artifacts require special exhibit mounts that we fabricate in house. We determine what may need special mounts during the case layout process and create whatever is needed. I usually prepare mounts that come into direct contact with artifacts, so long as the mount is made of materials that don’t require power tools. Here I am sewing a legging to a soft mount for an exhibit here at the State Museum. I created the mount using corrugated plastic, polyester batting, and undyed muslin.


Packing the artifacts is a challenging balance between ensuring artifact safety and maximizing space. When possible, they are packed into cardboard boxes and wrapped in foam padding. Filling the state vehicle for the drive to the site could best be compared to a game of Tetris, only with pieces that are fragile and of historical significance. Sounds fun, right?
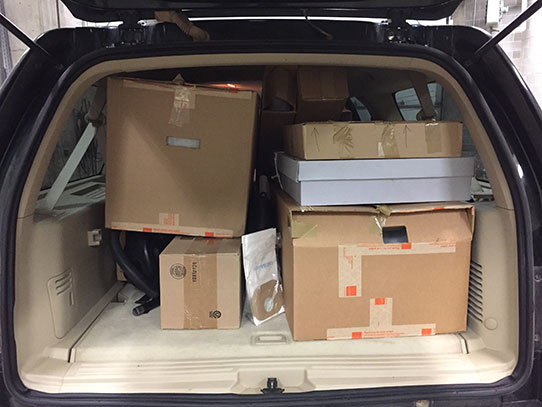
Loaded state vehicle

The loaded state vehicle, in this case a Ford Expedition, ready to go for our latest trip to the Missouri-Yellowstone Confluence Interpretive Center. Artifacts are wrapped in foam sheeting and placed inside boxes. It is a challenging mix of ensuring artifact safety while maximizing space.

Once at the site, the outgoing exhibit is taken down and artifacts are packed up. While the exhibits staff reset the gallery and prepare exhibit components, I unpack the artifacts going on display. At any given time, there could be anywhere from 50 to 100 artifacts to keep track of between the two shows. With sites that are in some cases four or five hours from Bismarck, it is essential to be consistent and keep track of the artifacts so none get lost.
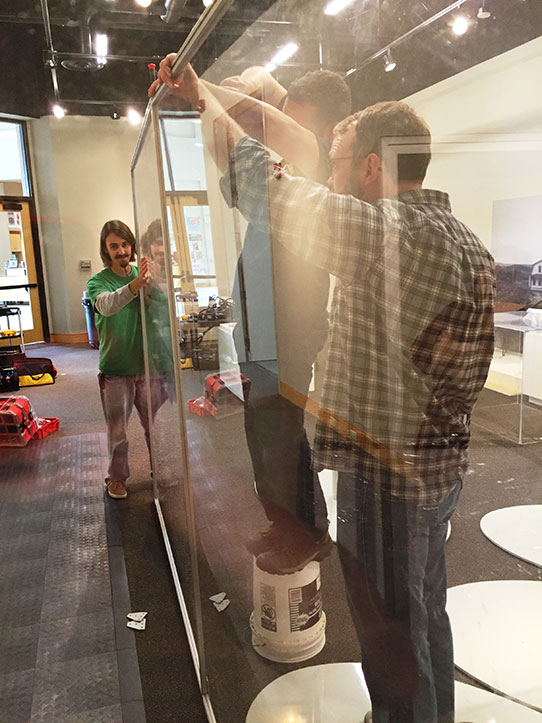
Assembling plexiglass wall

Once at the site, I pack artifacts from the outgoing show and unpack artifacts from the incoming, while the exhibit staff assembles, prepares, and moves exhibit components. Graphic designer Andrew Kerr, chief preparator Bryan Turnbow, and Museum Division director Mark Sundlov are seen at the Missouri Yellowstone Confluence Interpretive Center assembling a plexiglass wall for a trailer that went on display in the site’s newest temporary exhibit, about rural electrification cooperatives in North Dakota.

Once the gallery is laid out according to plan, we place the artifacts in the cases and arrange the labels. Then the plexiglass vitrines are lowered into place and cleanup begins. While the above paragraphs make it sound simple and quick, the installation is a long process that often involves at least one unexpected, but solvable, problem. At the end of it all, we head back to Bismarck with another carload of artifacts and start planning for the next installation.
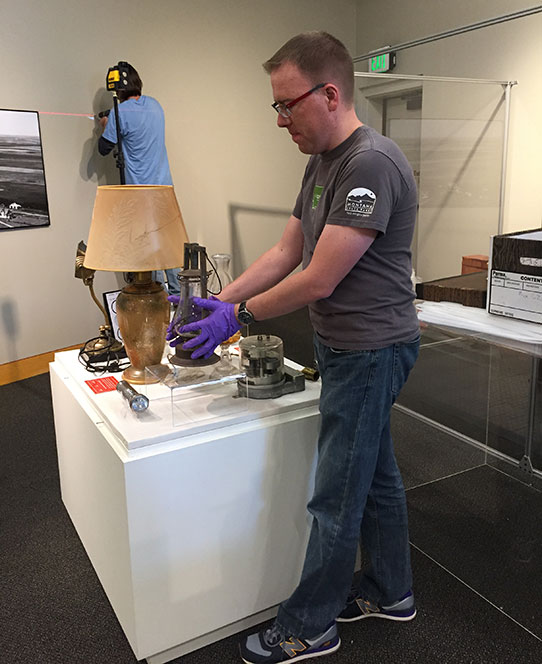
Installing artifacts

Once the gallery is reset and exhibit components are in place, we all work together to install artifacts in the cases according to photos we took of the case layouts back in Bismarck. Here I am putting the final touches on a case for an exhibit about rural electrification cooperatives at the Missouri-Yellowstone Confluence Interpretive Center. Once that is completed, plexiglass vitrines are lowered over the top and secured in place. In the background, graphic designer Andrew Kerr is using a laser level to hang photos and signage.
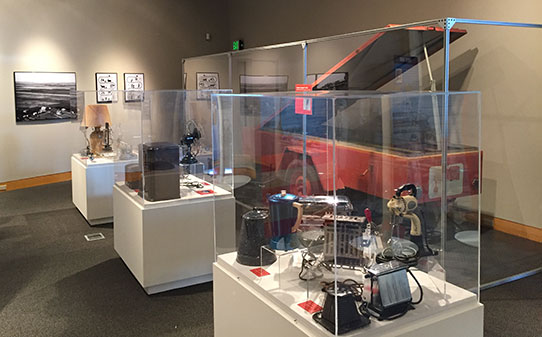
Finished exhibit

The finished exhibit. Each temporary exhibit represents weeks of work on the part of many staff members, in some cases from across our divisions. While the exhibit development process can be difficult at times, it is one of them most challenging, interesting, and rewarding things that I do!
Update on hospital/cafeteria restoration at Fort Totten State Historic Site

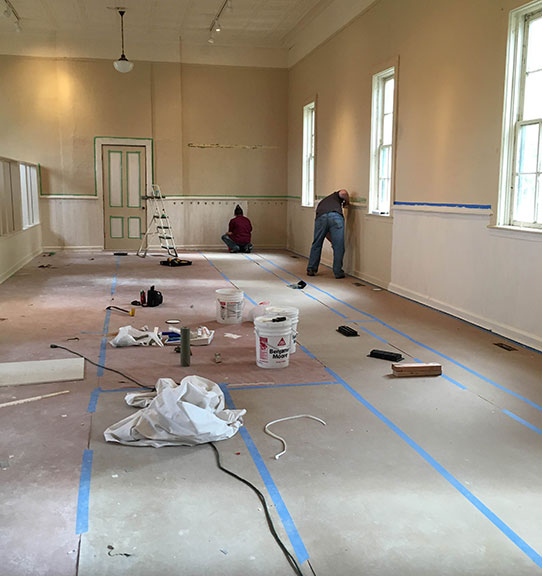
The past few months have seen many developments on the restoration of the historic hospital/cafeteria at Fort Totten State Historic Site. When we last left off (blog.statemuseum.nd.gov/blog/totten-restoration) contractors were beginning to install a new HVAC system and starting an electrical overhaul. Adding central air and heat to the building was a much needed update to properly house and display the historic collections of the Lake Region Pioneer Daughters.

Contractors began the extensive process of running duct work throughout the basement in the summer of 2016. The stone foundation, built by soldiers almost 150 years ago, is made of solid granite. In two separate places, contractors spent many hours drilling through the walls of the foundation to further the reach of the air flow system. This was a delicate and challenging process.

As the HVAC system installation was underway, the electricians completely rewired the building—running new wires and installing new outlets throughout. The interior was then scraped and painted, the original hardwood floors refinished, and the first floor windows restored.

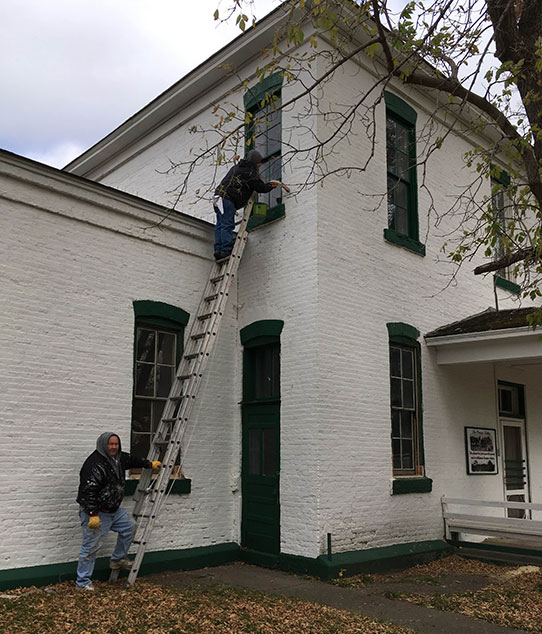
Exterior windows being painted

Contractors paint the exterior of windows that have recently been restored at Fort Totten’s historic hospital/cafeteria.

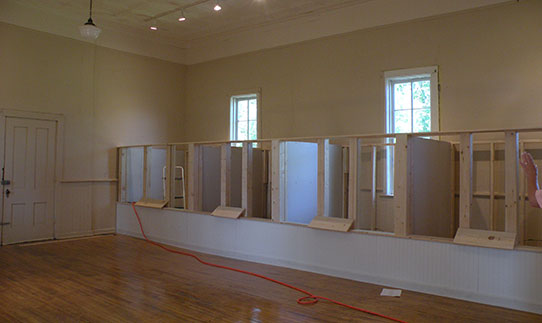
Most recently, work began on the exhibit “cubes” that will house the Pioneer Daughters collections. Each exhibit space will detail a different theme and part of the collection. The cubes have the flexibility to be changed each season, if desired, and offer greater security and protection to the artifacts on display.

Exhibit cubes being built

The exhibit “cubes” in the process of being built in the historic hospital/cafeteria at Fort Totten State Historic Site. Each cube will house a different part of the Lake Region Pioneer Daughters collection.

Once the cubes have been completed, work on exhibit development can begin. Throughout the winter, State Historical Society staff will carefully assess the collections and begin the lengthy process of cleaning and preparing artifacts for display. The completed hospital/cafeteria will also tell the story of the different uses of the building throughout its history—detailing its use as frontier military hospital, a tuberculosis preventorium, and a cafeteria for the industrial boarding school for American Indian children.

Learn more about Fort Totten and follow the site on Facebook for more restoration updates.

Painting wainscoting

Site Supervisor Kyle Nelson and Assistant Site Supervisor Lisa Alberts hard at work painting the wainscoting in the hospital/cafeteria at Fort Totten State Historic Site.

Take Two and Call Me in the Morning

I am often called upon with strange and unusual questions. How do I make a mannequin look less scary? What is the white powder covering the taxidermied elk? How do I get a raccoon out from under a historic house? These are all actual museum problems; however, it is generally easier to deal with the mannequin than the raccoon. So how is it that I get so many odd phone calls?

Raccoon

Who would evict this cute little guy?

My job here at the State Historical Society of North Dakota is to provide outreach services. I work with museums throughout the state to identify professional training opportunities. I can work with individuals one-on-one, or hold a workshop or training seminar for a group of people. I also help museums in our region stay on top of industry trends, standards, and best practices. I field questions about the basics of running a museum, and I work with museums to analyze their basic health and diagnose underlying problems. Essentially, if you compare what I do to the medical field, I’m a general practitioner. I know a little bit about a lot of things.

Ask More Questions sign

In North Dakota, a lot of museums are staffed by dedicated volunteers with little professional training. My job is to help these museum laypeople access the same resources the experienced professionals know about. They call me for a general diagnosis of a problem they are having, and just like a doctor, I help them assess their overall health and analyze some potential problems. It often happens though, that a museum has a unique issue that needs further consultation. In cases like this, I recommend them to a specialist who works with that specific issue more than I do. Just like a doctor will recommend that someone with diabetes see an endocrinologist, I will recommend a consultation with an architectural historian to learn more about appropriate roofing materials for a historic house. While a doctor might have someone with headaches see a neurologist, I will direct someone with questions about digitizing a photo collection to an archivist. A doctor might recommend a pediatrician to a new mom, and I will recommend someone call a professional conservator to help stabilize the historic textiles in their collection. You get the picture.

Plastic Head

Museum work is really nothing like neurology.

On a national level the museum community is relatively small compared to other industries, and specialists are often surprisingly accessible if you know who they are and what they do. My office serves as a sort of clearing house, providing access to the wider range of museum field services. There are professionals all over the country who are available to North Dakota museums through the existing networks of professionals, specialists, and other consultants. While I can’t answer every question that comes my way, I usually have an idea of who we can call for more help. I don’t have an answer for every question. I still don’t know why Eleven likes waffles so much, or who Jon Snow’s father is, but trust me—I’m diligently working on the answers.

Adventures in Archaeology Collections: Parts & Pieces

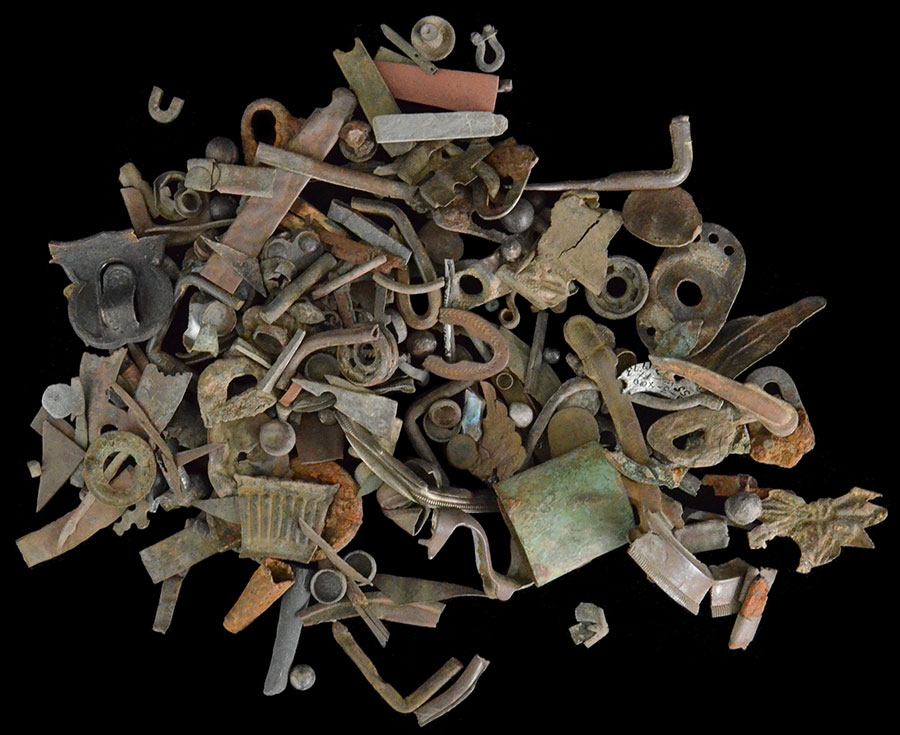
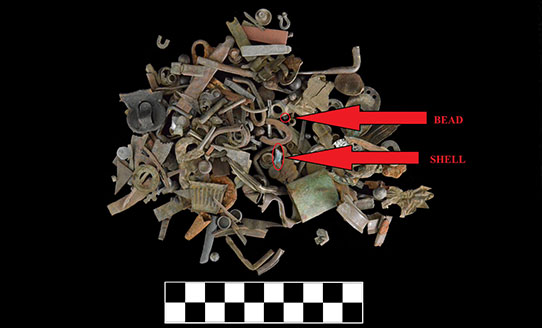
What do you see in this photo? (click photo to see larger image)

Miscellaneous Metal

Objects from a bag originally labelled “miscellaneous metal” (former 2010.99.3029

On the surface, it is a random pile of metal. But these aren’t just miscellaneous items, even though the bag they were stored in was originally labeled “miscellaneous metal”! They are artifacts that add to the story of a site. They are evidence of the things people used and the activities in which they participated. These are objects that were utilized, stored, discarded, lost, or left by people who lived at, worked at, or passed through Fort Rice (32MO102).

Part of the fun in sorting a bag of small parts and pieces is figuring out what they are—discovering that the pieces are part of something. Let’s take a closer look at a few of the items in that pile.

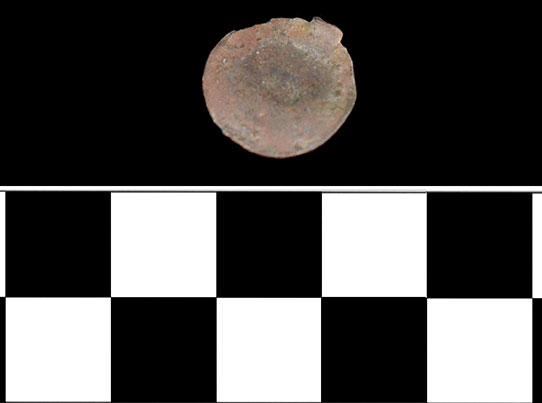
This plain-looking piece of metal is a tobacco twist or plug tag.

Tobacco twist tag

The artifact: a tobacco twist tag (2010.99.7493)

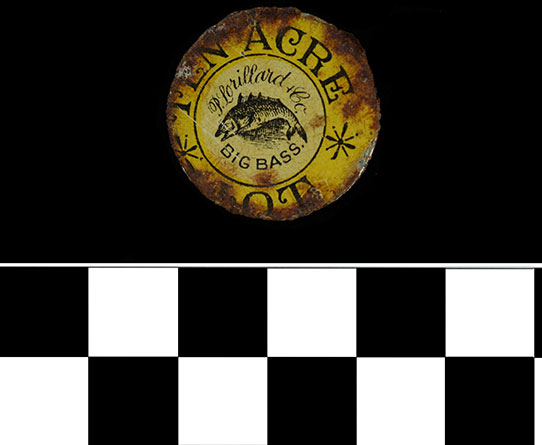
Both tobacco plugs and twists were used for pipe smoking or as chewing tobacco. Tobacco twists are formed by rolling and twisting tobacco leaves into a tight rope-like form. Cut blocks of pressed tobacco are called plugs. The tags were attached to the twists by a long prong while plug tags were attached with two short prongs. The tags were used to identify the tobacco brand. Any trace of a logo or decoration has worn off of this tag. Most tobacco tags were colorful like this more intact example from the site of Fort Berthold I.

Tobacco twist tag

An example: a tobacco twist tag from Fort Berthold I fort site (12711.144)

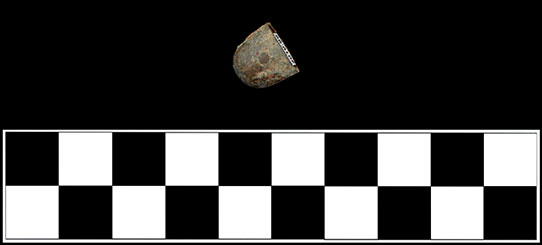
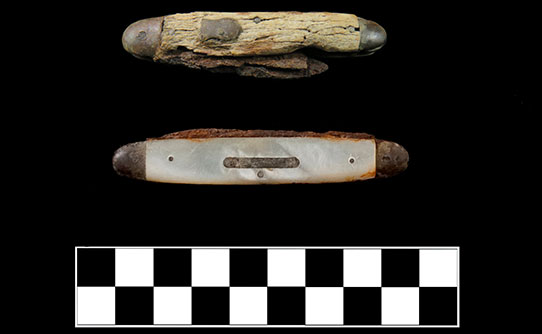
Some artifacts are only small parts of a larger object—like this item. It is a bolster (an end piece) from a pocket knife.

Pocket knife bolster

The part: a pocket knife bolster (2010.99.7477)

Pocket knives

Examples: almost complete pocket knives from Fort Rice. See where the bolsters fit? (2010.99.6179 & 2010.99.6187, photos by Doug Wurtz & David Nix – edited SHSND)

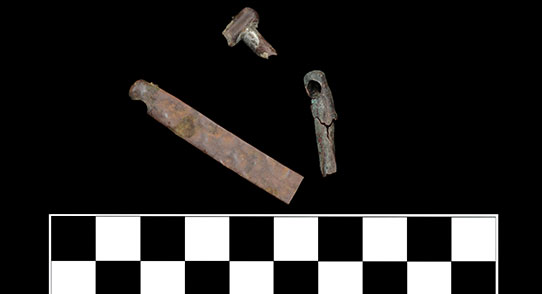
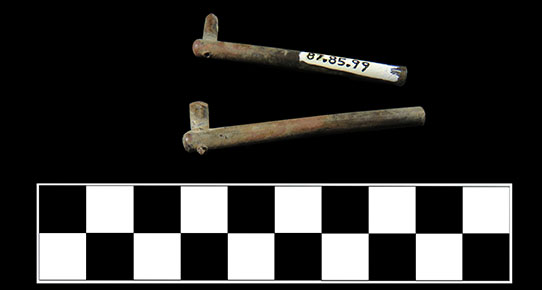
These odd looking fragments are pieces of friction primers used to ignite the gun powder in artillery.

Friction primer fragments

Parts: friction primer fragments (2010.99.7480, photo by Doug Wurtz – edited SHSND)

Friction primers

Examples: more complete friction primers also from Fort Rice (1987.85.98-99)

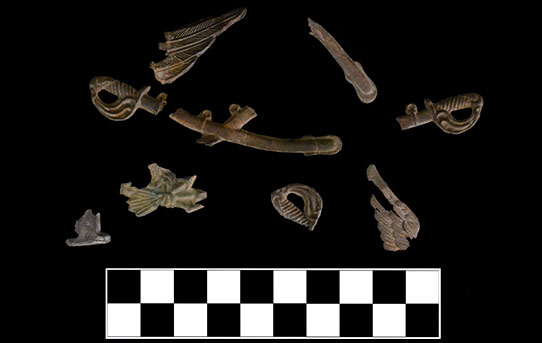
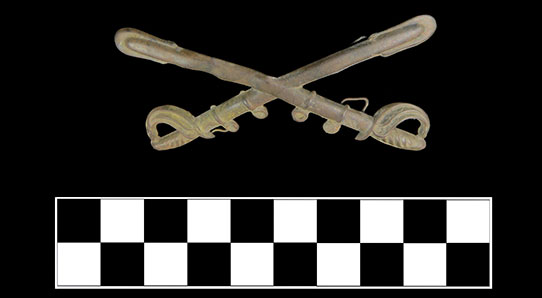
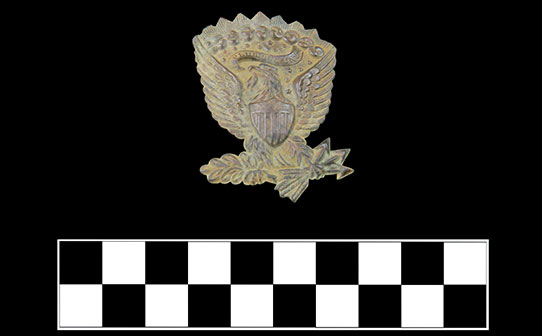
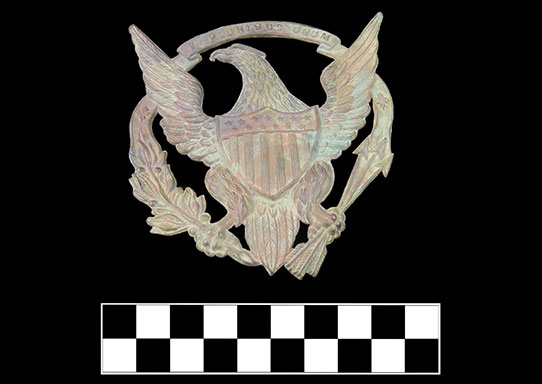
These are pieces of military insignia. There are at least three different types of hat insignia and what appears to be part of a regiment number or company letter in this group.

Military insignia fragments

Parts: military insignia fragments (2010.99.7487)

Cavalry hat insignia

Example: a complete cavalry hat insignia for an enlisted man, from Fort Rice (12003.2445, photo by Doug Wurtz – edited SHSND)

Model 1858 dress hat pin

Example: a Model 1858 dress hat (Hardee hat) pin from Fort Rice (2010.99.6132, photo by Doug Wurtz – edited SHSND)

Cavalry dress helmet insignia

Example: an enlisted man’s cavalry dress helmet insignia from Fort Rice (2010.99.6144, photo by Doug Wurtz –edited SHSND)

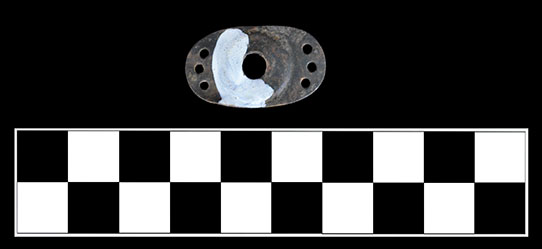
This is part of a shoulder scale turnkey or button base.

Button or turnkey base from shoulder scale

The part: a button or turnkey base from a shoulder scale (2010.99.7488)

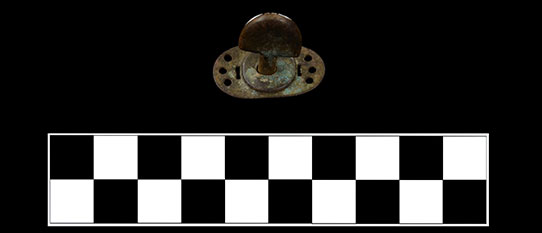
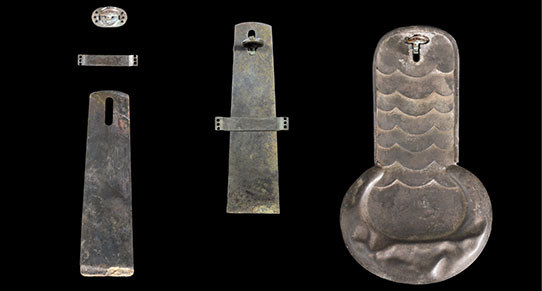
Shoulder scales (a type of epaulet sometimes called brass scales, or metallic scales) were used as part of military uniform and were worn on the shoulders. The turnkey helped attach the main part of the shoulder scale to the rest of the uniform. Shoulder scales are made from many distinct pieces.

Turnkey or button from shoulder scale

Example: a complete turnkey or button from a shoulder scale from Fort Rice (2010.99.3493)

Attachment parts for shoulder scale

Example: attachment parts for a shoulder scale, right- the attachment pieces, middle - how the attachment pieces fit together, right – how the turnkey looks when fit attached to the complete shoulder scale (all pieces from Fort Rice)

Of course there are many other items visible in the first photo. Other artifacts so far identified in this group of objects include pieces of lead shot, a thumb tack, buckles, buttons, pencil leads, rivets, bell fragments, pocket watch parts, and even part of an earring! Two non-metal items were found in same bag as well. If you are up to the challenge, see if you can find the light blue glass bead and abalone shell fragment in the first photo! I’ll post the answer below.

How do you identify things you don’t recognize? I’ve had a lot of help identifying these and other objects. Asking other people is a good start--other staff at the historical society (museum, archives, education, paleontology, archaeology and historic preservation staff, even custodial staff), researchers, as well as volunteers and members of the public have all helped me. Online sources can also be helpful—like research blogs, re-enactment discussions, and museum websites. And of course, it is still hard to beat a really good book when looking for information (for instance, The U.S. Army in the West, 1870-1880 by Douglas C. McChristian was very helpful with many of the objects in this post).

Bead and shell pointed out from first photo

Did you find the glass bead and piece of shell in the first photo?

Year of the Plesiosaur


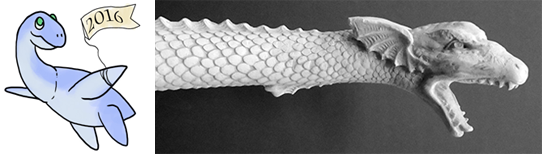
In the Chinese calendar, this is the Year of the Monkey. If Paleontology had a calendar, it would be the Year of the Plesiosaur! Northeastern North Dakota is well known for its underwater fauna. Mosasaurs (giant marine reptiles) swam alongside Archelon (giant sea turtles), Hesperornis (flightless birds), as well as plenty of fish and squid. Another type of marine reptile lived here that many people identify with the Loch Ness Monster (Nessie) – a plesiosaur.

Cartoon plesiosaur and scupture of Loch Ness Monster

Right: Sculpture of the Loch Ness Monster

Brief science lesson: plesiosaurs are a group of marine reptiles that contain a number of divisions. One group, the Pliosauroidea, had large heads and short necks. The other group, Plesiosauroidea, in general had small heads and long necks. Prior to their descriptions in 1824, they were grouped together with other marine reptiles, and sometimes even fish. Since then many shapes and sizes have been found – but few from North Dakota.

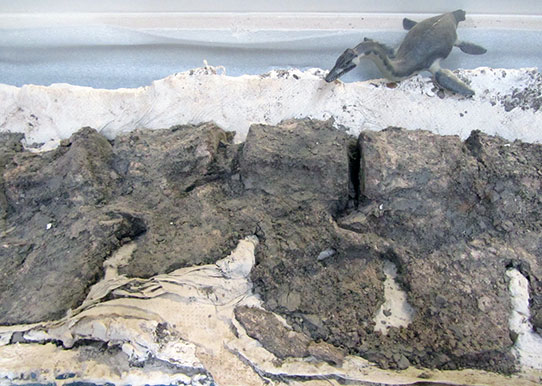
As of 2015, the State Fossil Collection had two elasmosaurid (reaaaallly long neck) vertebrae. One is on display in the Adaptation Gallery: Geologic Time of the North Dakota Heritage Center, and the other is on display in Icelandic State Park. During the National Fossil Day event last October, a private citizen turned in another vertebra found south of Bismarck. In spring 2016, paleontologists Clint Boyd and Jeff Person made a road trip down to the Pioneer Trails Regional Museum in Bowman. Behold – more! Not just one vertebra, but 15 articulated neck bones, plus bits of a partial skeleton! Then, icing on the cake – During our Pembina Gorge dig, a local brought in some bones to have them identified – yet another plesiosaur vertebra, this time from the body. The creatures were coming out of the woodwork from all across the state – it was amazing.

Plesiosaur vertebrae

Vertebrae from the articulated neck of a plesiosaur. Fifteen were collected; one neck had around 70 vertebrae.

The next steps will be to fully prepare the material found, and then identify who it belongs to. Saying “plesiosaur” is like saying “dog.” It’s a general term that gets a basic body shape in mind (notice the lower-case letter and non-italics). What we want to know are the specifics. Saying “Elasmosaurus” or “Styxosaurus” would be like saying German Shepherd and Scottish Terrier – a narrower description (also uppercase first letter and italics).

It is important to note – plesiosaurs are not dinosaurs. They are marine reptiles. For example, if we take a dog (land mammal), and a dolphin (water mammal) – both are mammals, both can coexist, but they are not closely related. It is the same with a plesiosaur (water reptile), and a dinosaur (land reptile).

Lessons from Lake Agassiz

I would guess that research sounds like a pretty dull job to most people. Nose down in book, hand scribbling notes, eyes growing bleary, back bone slowly coiling into a permanent loop around the desktop. I won’t deny that all of that happens. But the process is also one of discovery. There is always something new, something cool to add the body of knowledge we share with those who read our curricula and newsletters.

When we decided to write about the geology of the Red River Valley for the North Dakota Studies newsletter, I entered the research cautiously. I am a historian. I love documents; I can understand anything old on paper. Layers of dirt are important, but I have always considered rocks and dirt to be someone else’s joy-filled research project. Reading through the documents, I slowly absorbed the geological history of the great glacial Lake Agassiz that formed the Red River Valley thousands of years ago.

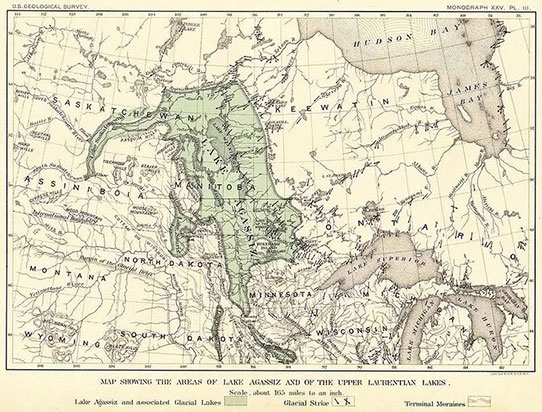
Lake Agassiz in 1895

This map of glacial Lake Agassiz was drawn by Warren Upham in 1895. He based it on available knowledge of Lake Agassiz’s shorelines. W. Upham, The Glacial Lake Agassiz

And those numbers! I can easily grasp the historical flow of a couple of centuries, but 11,000 years is almost beyond comprehension. When I read that Lake Agassiz “briefly” overflowed into present day Minnesota for a period of only 300 years, I wondered how many generations of people might have thought of that temporary shoreline as a permanent part of the landscape. You could almost hear their discouraging words as the shoreline where they had always fished receded to the west.

Nevertheless, I learned some very interesting things about Lake Agassiz. The lake did not fill all of the space that is today considered the ancient lake bed. The lake rose and receded, overflowing here and there over several thousand years. Changing water levels left ripples of shorelines that are easily visible in the southern Red River Valley. In forests to the north, the shorelines are more difficult to locate, but new information surfaces from time to time.

Another interesting thing I learned is that the ancient lake is today the focus of research on how global warming might affect North America and the Atlantic Ocean. As the huge lake, the largest in North America, drained through Hudson Bay into the Atlantic Ocean, it changed the chemistry of the ocean and cooled the air temperature of northern hemisphere. At least, that is the current working hypothesis. Climate scientists are still working on the problem, but it appears that the geologic history of Lake Agassiz may help us understand global warming today.

Lake Agassiz’s peculiar geology created the Red River Valley, one of the greatest agricultural regions in the world.

Major Fleming's House

The lakebed of Lake Agassiz formed the large, flat valley of the Red River. In the 1870s, the Red River Valley attracted settlers who found the rich soil was perfect for wheat farming. SHSND C0868

Today, we talk about the land that our grandfathers farmed and about our attachment to this place. I wonder how many more generations will call it home before geological change takes place once again and leaves us wondering where it all went.